
GB/CY GB/CY
GB/CY GB/CYGB/CY GB/CYGB/CY GB/CY
RORORORORORO
nou. Atâta timp cât apăsaţi tasta START
2
, se aude din nou
alarma.
j Apăsaţi tasta RESET
4
, pentru a opri alarma. Atunci când nu
apăsaţi nicio tastă, alarma se aude timp de 1 minut.
j Apăsaţi tasta RESET
4
, în timp ce vă aflaţi în modul temporal,
pentru a afișa ora de alarmă setată.
j Dacă ceasul se află în modul temporal, apăsaţi și ţineţi apăsată
tasta RESET
4
. Apoi apăsaţi tasta START
2
, pentru a opri
alarma. Simbolul de alarmă
7
dispare.
Q
Activarea / dezactivarea
semnalului sonor
Indicaţie: La fiecare oră fixă se aude un semnal sonor scurt.
j Apăsaţi de atâtea ori tasta MODE
6
până când, apare afișa-
jul orei
3
pe display.
j Ţineţi tasta RESET
4
apăsată și apăsaţi în același timp tasta
MODE
6
. Toate zilele săptămânii
1
sunt iluminate. Semnalul
sonor este activat.
j Ţineţi tasta RESET
4
apăsată și apăsaţi în același timp tasta
MODE
6
. Afișajul tuturor zilelor săptămânii
1
dispare.
Semnalul sonor este dezactivat.
Q
Utilizarea cronometrului
j Apăsaţi de atâtea ori tasta MODE
6
până când, apare afișa-
jul orei
3
pe display.
j Apăsaţi o dată tasta MODE
6
, pentru a trece în modul de
cronometrare.
j Apăsaţi tasta START
2
, pentru a porni cronometrarea.
Q
Utilizarea iluminării
j Apăsaţi și menţineţi apăsată tasta LIGHT
8
, pentru a porni
iluminarea.
j Eliberaţi tasta LIGHT
8
din nou iar lumina se stinge după
aproximativ 3 secunde.
Q
Afișarea datei
j Apăsaţi tasta START
2
, în timp ce ceasul se află în modul tem-
poral. Apare data pe display.
j Eliberaţi tasta START
2
, pentru a trece din nou în modul temporal.
Q
Setarea alarmei
j Apăsaţi de două ori tasta MODE
6
, pentru a trece în modul
de alarmă. Afișajul orei de alarmă pâlpâie pe display.
j Apăsaţi tasta START
2
, pentru a seta ora.
j Apăsaţi tasta RESET
4
, pentru a confirma setarea dvs. Afișajul
de minute pâlpâie pe display.
j Apăsaţi tasta START
2
, pentru a seta minutele.
j Apăsaţi tasta RESET
4
, pentru a confirma setarea dvs.
j Apăsaţi tasta MODE
6
, pentru a trece la modul temporal.
Q
Pornirea-/oprirea alarmei
j Porniţi și opriţi alarma prin apăsarea și menţinerea apăsată a
tastei START
2
și tastei RESET
4
în modul temporal. Atunci când
alarma este activată, apare pe display simbolul de alarmă
7
.
j Atunci când se aude alarma, activaţi funcţia Snooze prin apăsa-
rea tastei START
2
. După 4 până 5 minute se aude alarma din
Q
Setarea orei și datei
1. Apăsaţi de trei ori pe tasta MODE
6
. Afișajul de secunde
5
cât și cel al zilei de săptămână
1
pâlpâie pe display.
2. Apăsaţi tasta START
2
, pentru a seta afișajul de secunde
5
pe 0.
3. Apăsaţi tasta RESET
4
, pentru a confirma setarea dvs. Afișajul
de minute pâlpâie pe display.
4. Apăsaţi tasta START
2
, pentru a seta minutele.
5. Apăsaţi tasta RESET
4
, pentru a confirma setarea dvs. Afișajul
de ore pâlpâie pe display.
6. Apăsaţi tasta START
2
, pentru a seta ora.
Indicaţie: La setarea orei aveţi grijă la simbolurile A, P, și H
5
, care apar pe display. A și P (A = dimineaţa / P = după
masa) reprezintă formatul de 12 ore. H reprezintă formatul de 24
de ore. Apăsaţi tasta START
2
, pentru a seta valoarea dorită și
formatul dorit. Apăsaţi tasta RESET
4
, pentru a confirma seta-
rea dvs.
7. Apăsaţi tasta RESET
4
, pentru a confirma setarea dvs. Afișajul
datei pâlpâie pe display.
8. Apăsaţi tasta START
2
, pentru a seta data.
9. Apăsaţi tasta RESET
4
, pentru a confirma setarea dvs. Afișajul
lunii pâlpâie pe display.
10. Apăsaţi tasta START
2
, pentru a seta luna.
11. Repetaţi pașii 8 și 9, pentru a seta ziua săptămânii
1
. Zilele
săptămânii sunt abreviate după cum urmează:
MO = Luni
TU = Marţi
WE = Miercuri
TH = Joi
FR = Vineri
SA = Sâmbătă
SU = Duminică
12. Apăsaţi tasta MODE
6
, pentru a trece la afișajul standard.
bateriile s-au scurs în aparatul dvs., scoateţi-le imediat pentru a
împiedica deteriorarea aparatului!
J Evitaţi contactul cu pielea, ochii și mucoasele. În cazul unui con-
tact cu acidul din baterie clătiţi locul respectiv cu multă apă și /
sau apelaţi la un medic!
Q
Etanșeitate (rezistenţă la apă)
J Acest ceas este etanș până la o presiune de 3 bari conform
DIN 8310.
rezistent la o presiune
în apă de 3 bari
J Nu apăsaţi pe nicio tastă atunci când, ceasul a intrat în contact
cu apa.
Q
Schimbarea bateriilor
J Notă: schimbaţi bateriile într-un atelier specializat.
J Dispuneţi schimbarea bateriilor și efectuarea reparaţiilor numai
de către o persoană calificată, pentru a împiedica deteriorarea
mecanismului.
J Înlăturaţi în mod ecologic bateriile consumate.
J Nu aruncaţi ceasul la gunoiul menajer.
Q
Utilizare
j Apăsaţi tasta MODE
6
, pentru a seta modul dorit: Mod tem-
poral > Cronometru > Alarmă > Setare oră > Mod temporal.
Indicaţii de siguranţă
PĂSTRAŢI TOATE INDICAŢIILE DE SIGURANŢĂ ŞI INSTRUCŢIU-
NILE PENTRU VIITOR!
J
AVERTISMENT!
PERICOL DE MOARTE
ȘI DE ACCIDENTARE PENTRU SUGARI ȘI
COPII! Nu lăsaţi niciodată copii nesupravegheaţi
în apropierea materialului de ambalaj. Există pericol de asfixiere.
AVERTISMENT!
PERICOL DE MOARTE! Bateriile pot fi
înghiţite, ceea ce poate reprezenta un pericol de moarte. Atunci
când a fost înghiţită o baterie, trebuie solicitat imediat ajutorul
medicului.
J Nu demontaţi în niciun caz aparatul. Datorită reparaţiilor neco-
respunzătoare pot apărea pericole considerabile pentru utiliza-
tori. Lucrările de reparaţie au voie să fie efectuate numai de
către personal calificat.
Indicaţii de siguranţă
privind bateriile
J ATENŢIE! PERICOL DE EXPLOZIE! Nu încăr-
caţi niciodată bateriile!
J Înlăturaţi imediat o baterie goală din aparat. Există pericol mărit
de scurgere!
J Bateriile nu se aruncă la gunoiul menajer!
J Fiecare consumator este obligat legal să înlăture bateriile în
mod corespunzător!
J Bateriile nu se ţin la îndemâna copiilor, nu se aruncă în foc, nu
se supun unui scurt circuit și nu se demontează.
J În caz de nerespectarea indicaţiilor, bateriile se pot descărca în
afara tensiunii lor finale. Atunci apare pericolul scurgerii. Dacă
Ceas de mână
Q
Introducere
Înainte de prima utilizare informaţi-vă cu privire la pro- Înainte de prima utilizare informaţi-vă cu privire la pro-Înainte de prima utilizare informaţi-vă cu privire la pro-
dus. Pentru aceasta citiţi cu atenţie următorul manual de
utilizare și montaj și indicaţiile de siguranţă. Folosiţi pro-
dusul numai în modul descris și numai în domeniile de utilizare indica-
te. Păstraţi bine aceste instrucţiuni. În caz că, daţi produsul mai de-
parte la terţi, înmânaţi de asemenea și documentaţia acestuia.
Q
Utilizare conform scopului
Ceasul de mână indică ora și data și deţine o funcţie de alarmă și
de cronometrare. Alte utilizări sau modificări ale aparatului sunt con-
siderate ca fiind necorespunzătoare scopului și pot cauza riscuri cât
și accidentări sau deteriorări ale aparatului. Pentru daunele cauzate
de o utilizare necorespunzătoare scopului, producătorul nu preia ni-
cio responsabilitate. Acest aparat nu este destinat utilizării comerciale.
Q
Descrierea componentelor
1
Afișaj zi săptămână
2
Tastă START
3
Afișaj oră
4
Tastă RESET
5
Afișaj secunde / Afișaj „H“
6
Tastă MODE
7
Simbol alarmă
8
Tastă LIGHT
9
Afișaj „A“ / „P“
HRHRHRHRHRHR
HRHR
O mogućnostima zbrinjavanja dotrajalog proizvoda možete se
informirati pri vašem općinskom ili gradskom komunalnom uredu.
Ne bacajte dotrajali proizvod u smeće iz kućanstva,
zbog zaštite okoline, već ga predajte na mjestu za stručno
odlaganje otpada. Informacije o mjestima za sakuplja-
nje otpada i njihovom radnom vremenu možete dobiti
pri Vašem nadležnom općinskom uredu.
Oštećene ili istrošene baterije potrebno je sukladno smjernici
2006 / 66 / EC predati sustavu reciklaže. Vratite baterije i / ili uređaj
preko ponuđenih sabirnih ustanova.
Ugrožavanje okoliša kroz
pogrešno uklanjanje baterija!
Baterije se ne smije uklanjati zajedno s kućnim otpadom. Iste mogu
sadržavati otrovne teške metale i obvezno ih je uklanjati sukladno
odredbama za poseban otpad. Kemički znakovi teških metala su sli-
jedeći: Cd = kadmij, Hg = živa, Pb = olovo. Stoga predajte istrošene
baterije na komunalno mjesto za sabiranje otpada.
Izjava o sukladnosti za ovaj proizvod dostupna je na internet stranici
www.lidl.hr.
Q
Uporaba štoperice
j Pritiskajte tipku MODE
6
toliko često, sve dok se pokazivanje
vremena
3
pojavi na pokazivaču.
j Pritisnite jednom tipku MODE
6
, kako bi dospjeli u modus
štoperice.
j Pritisnite tipku START
2
, kako bi uključili štopericu.
j Ponovno pritisnite tipku START
2
kako bi zaustavili štopericu.
j Pritisnite tipku RESET
4
, kako bi štopericu namjestili na 0.
Mjerenje međuvremena:
j Pritiskajte tipku MODE
6
toliko često, sve dok se pokazivanje
vremena
3
pojavi na pokazivaču.
j Pritisnite jednom tipku MODE
6
, kako bi dospjeli u modus
štoperice.
j Pritisnite tipku START
2
, kako bi uključili štopericu.
j Pritisnite tipku RESET
4
, kako bi se pokazalo namješteno među-
vrijeme. Štoperica i dalje radi u pozadini.
j Ponovno pritisnite tipku RESET
4
, kako bi se ponovno vratili na
štopericu.
j Pritisnite tipku START
2
, kako bi zaustavili štopericu.
j Pritisnite tipku RESET
4
, kako bi štopericu namjestili na 0.
Q
Čišćenje i njega
j Čistite proizvod suhom krpom bez sitnih vlakanaca. Idealna je
krpa za brisanje očala.
Q
Zbrinjavanje otpada
Pakiranje se sastoji od ekološki prihvatljivog materijala, kojeg
možete odložiti preko lokalnih reciklažnih mjesta.
Q
Uključivanje/Isključivanje alarma
j Uključite i isključite alarm, na način da u modusu vremena držite
tipke START
2
i RESET
4
pritisnutim. Kad je uključen alarm,
znak alarm se pojavi na pokazivaču
7
.
j Kad zazvuči alarm, uključite funkciju Snooze, pritiskanjem tipke
START
2
. Alarm će ponovno zazvučati nakon 4 do 5 minuta.
Dok držite tipku START
2
pritisnutom, alarm ponovno zazvuči.
j Pritisnite tipku RESET
4
, kako bi zaustavili alarm. Ako ne priti-
snete niti jednu tipku, alarm će otprilike 1 minutu zazvučati.
j Pritisnite tipku RESET
4
, dok se sat nalazi u modusu vremena,
kako bi se pokazalo namješteno vrijeme alarma.
j Ako se sat nalazi u modusu vremena, držite tipku RESET
4
priti-
snutom. Nakon toga pritisnite tipku START
2
, kako bi isključili
alarm. Znak alarma
7
se izgasi.
Q
Uključivanje / Isključivanje alarma
Uputa: Svaki puni sat zazvuči kratki signalni zvuk.
j Pritiskajte tipku MODE
6
toliko često, sve dok se pokazivanje
vremena
3
pojavi na pokazivaču.
j Držite tipku RESET
4
pritisnutom i istovremeno pritisnite tipku
MODE
6
. Svi dani pokazivanja dana u tjednu
1
zasvjetle.
Signalni zvuk je uključen.
j Držite tipku RESET
4
pritisnutom i istovremeno pritisnite tipku
MODE
6
. Izgasit će se pokazivanje svih dana u pokazivanju
dana u tjednu
1
. Signalni zvuk je isključen.
12. Pritisnite tipku MODE
6
, kako bi dospjeli do standardnog
pokazivanja.
Q
Uporaba osvjetljenja
j Držite tipku LIGHT
8
pritisnutom, kako bi uključili svjetlo.
j Ponovno otpustite tipku LIGHT
8
i svjetlo se izgasi nakon
otprilike 3 sekunde.
Q
Pokazivanje nadnevka
j Pritisnite tipku START
2
, dok se sat nalazi u modusu vremena.
Nadnevak će se pojaviti na pokazivaču.
j Otpustite tipku START
2
, kako bi ponovno dospjeli u modus
vremena.
Q
Namještanje alarma
j Pritisnite tipku MODE
6
dva puta, kako bi prebacili u modus
alarma. Pokazivanje vremena alarma žmiga na pokazivaču.
j Pritisnite tipku START
2
, kako bi namjestili sate.
j Pritisnite tipku RESET
4
, kako bi potvrdili Vaš unos. Pokazivanje
minuta žmiga na pokazivaču.
j Pritisnite tipku START
2
, kako bi namjestili minute.
j Pritisnite tipku RESET
4
, kako bi potvrdili Vaš unos.
j Pritisnite tipku MODE
6
, kako bi dospjeli do modusa vremena.
Q
Namještanje vremena i nadnevka
1. Pritisnite tri puta tipku MODE
6
. Pokazivanje sekundi
5
kao i
pokazivanje dana u tjednu
1
žmigaju na pokazivaču.
2. Pritisnite tipku START
2
, kako namjestili pokazivanje sedundi
5
na 0.
3. Pritisnite tipku RESET
4
, kako bi potvrdili Vaš unos. Pokazivanje
sekundi žmiga na pokazivaču.
4. Pritisnite tipku START
2
, kako bi namjestili minute.
5. Pritisnite tipku RESET
4
, kako bi potvrdili Vaš unos. Pokazivanje
sati žmiga na pokazivaču.
6. Pritisnite tipku START
2
, kako bi namjestili sate.
Uputa: Pri namještanju sati, vodite računa o znakovima A,
P i H
5
, koji se pojavljuju na pokazivaču. A i P (A =
prijepodne / P = poslepodne) stoje za format 12 sati. H stoji za
format 24 sata. Pritisnite tipku START
2
, kako bi namjestili
željenu vrijednost i željeni format. Pritisnite tipku RESET
4
, kako
bi potvrdili Vaš unos.
7. Pritisnite tipku RESET
4
, kako bi potvrdili Vaš unos. Pokazivanje
nadnevka žmiga na pokazivaču.
8. Pritisnite tipku START
2
kako bi se namjestio nadnevak.
9. Pritisnite tipku RESET
4
, kako bi potvrdili Vaš unos. Pokazivanje
mjeseca žmiga na pokazivaču.
10. Pritisnite tipku START
2
, kako bi namjestili mjesec.
11. Ponovite korake 8. i 9., kako bi namjestili dan u tjednu
1
.
Kratice za dan su slijedeće:
MO = ponedjeljak
TU = utorak
WE = srijeda
TH = četvrtak
FR = petak
SA = subota
SU = nedjelja
J U slučaju ne pridržavanja uputa, baterija bi se mogla isprazniti
ispod donje granice napona. Tada se javlja opasnost od istjeca-
nja baterije. Ako baterija iscuri u uređaju, potrebno ju je odmah
izvaditi kako biste spriječili oštećenja na uređaju!
J Izbjegavajte kontakt s kožom, očima i sluznicom. U slučaju doti-
caja s kiselinom iz baterije isperite mjesto na koje je dospjela
kiselina s puno vode i / ili se obratite liječniku!
Q
Nepromočivost
J Ovaj sat je nepromočiv sve do 3 bara sukladno DIN 8310.
3 bara nepromočiv
J Ne pritiskajte niti jednu tipku, ako sat dođe u dodir s vodom.
Q
Zamjena baterije
J Napomena: Baterije promijenite u specijaliziranoj trgovini.
J Prepustite zamjenu baterije i popravke isključivo stručnjaku, kako
bi spriječili oštećenje satnog mehanizma.
J Uklonite istrošene baterije na način koji ne ugrožava okoliš.
J Ne bacite sat u kućni otpad.
Q
Opsluživanje
j Pritisnite tipku MODE
6
, kako bi namjestili željeni modus:
vremenski modus > štoperica > alarm > namještanje vremena >
vremenski modus.
9
tipka „A“ / „P“
Sigurnosne upute
SAČUVAJTE SVE SIGURNOSNE NAPOMENE I UPUTE ZA
BUDUĆNOST!
J
UPOZORENJE!
OPASNOST PO ŽI-
VOT I OPASNOST OD OZLJEDA ZA DJECU
I MALU DJECU! Nikada ne ostavljajte djecu bez
nadzora s ambalažom. Postoji opasnost od ugušenja.
UPOZORENJE!
OPASNOST PO ŽI.VOT! Moglo bi se
progutati baterije, što je opasno po život. Ako se proguta
bateriju, potrebno je smjesta zatražiti medicinsku pomoć.
J Nemojte nikada rastavljati proizvod. Nestručnim popravcima
može se znatno ugroziti korisnika. Prepustite popravak samo
stručnim osobama.
Sigurnosne upute za baterije
J OPREZ! OPASNOST OD EKSPLOZIJE!
Nikada ne punite baterije!
J Prazna baterija se mora odmah izvaditi iz uređaja. Postoji
povećana opasnost od istjecanja baterije!
J Baterije se ne smiju bacati u kućno smeće!
J Svaki potrošač je zakonski dužan zbrinjavati baterije u skladu
propisima!
J Bateriju držite podalje od dohvata djece, ne bacajte je u vatru,
ne stavljajte u kratki spoj i ne rastavljajte je.
Ručni sat
Q
Uvod
Upoznajte se sa uređajem, prije prvog stavljanja u po- Upoznajte se sa uređajem, prije prvog stavljanja u po-Upoznajte se sa uređajem, prije prvog stavljanja u po-
gon. Za to pomno pročitajte slijedeće upute za uporabu
i sigurnost. Rabite uređaj isključivo sukladno opisu i za
navedena područja primjene. Dobro sačuvajte ove upute za uporabu.
U slučaju prosljeđivanja uređaja trećim osobama, predajte također
svu pripadajuću dokumentaciju.
Q
Odgovarajuća uporaba
Ručni sat pokazuje vrijeme i nadnevak i sadrži funkciju za alarm i
štopericu. Nije dozvoljeno upotrebljavati proizvod za nešto drugo,
što nije prethodno navedeno ili raditi izmjene na proizvodu jer bi to
moglo uzrokovati ozljede i / ili oštetiti proizvod. Proizvođač ne odgo-
vara za štete nastale uslijed nedozvoljene upotrebe. Proizvod nije
namjenjen za profesionalnu upotrebu.
Q
Opis dijelova
1
pokazivanje dana u tjednu
2
tipka START
3
pokazivanje vremena
4
tipka RESET
5
pokazivanje sekundi / tipka „H“
6
tipka MODE
7
znak alarm
8
tipka LIGHT
Faulty or used batteries must be recycled in accordance with Directive
2006 / 66 / EC. Please return the batteries and / or the device to the
available collection points.
Environmental damage through
incorrect disposal of the batteries!
Batteries may not be disposed of with the usual domestic waste.
They may contain toxic heavy metals and are subject to hazardous
waste treatment rules and regulations. The chemical symbols for
heavy metals are as follows: Cd = cadmium, Hg= mercury, Pb = lead.
That is why you should dispose of used batteries at a local collection
point.
Measuring an intermediate time:
j Press the MODE button
6
repeatedly until the time field
3
appears in the display.
j Press the MODE button
6
once to enter the stopwatch mode.
j Press the START button
2
to start the stopwatch.
j Press the RESET button
4
to display the intermediate time. The
stopwatch continues to run in the background.
j Press the RESET button
4
to return to the stopwatch time.
j Press the START button
2
to stop the stopwatch.
j Press the RESET button
4
to set the stopwatch to 0.
Q
Cleaning and care
j Clean the product with a dry, fluff-free cloth. A spectacles cloth
is ideal.
Q
Disposal
The packaging is made entirely of recyclable materials,
which you may dispose of at local recycling facilities.
Contact your local refuse disposal authority for more details of how
to dispose of your worn-out product.
To help protect the environment, please dispose of the
product properly when it has reached the end of its use-
ful life and not in the household waste. Information on
collection points and their opening hours can be
obtained from your local authority.
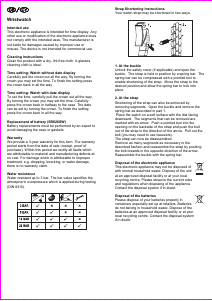
to 5 minutes. The alarm will keep on sounding as many times as
you press the START button
2
.
j Press the RESET button
4
to stop the alarm. The alarm will keep
on sounding for approx. 1 minute if you don’t press any button.
j Press the RESET button
4
when the watch is in time mode to
display the alarm time.
j If the watch is in time mode, press and keep pressed the RESET
button
4
. Press the START button
2
to switch off the alarm.
The alarm symbol
7
disappears.
Q
Activating / deactivating
the acoustic signal
Note: An acoustic signal will sound every hour on the hour.
j Press the MODE button
6
repeatedly until the time field
3
appears in the display.
j Press and keep pressed the RESET button
4
and while doing
this, press the MODE button
6
. All the day of the week fields
1
appear. The audible signal function is activated.
j Press and keep pressed the RESET button
4
and while doing
this, press the MODE button
6
. All the day of the week fields
1
disappear. The audible signal function is deactivated.
Q
Using the stopwatch
j Press the MODE button
6
repeatedly until the time field
3
appears in the display.
j Press the MODE button
6
once to enter the stopwatch mode.
j Press the START button
2
to start the stopwatch.
j Press the START button
2
again to stop the stopwatch.
j Press the RESET button
4
to set the stopwatch to 0.
Q
Lighting the display
j Press and keep pressed the LIGHT button
8
to switch on the light.
j Release the LIGHT button
8
and the light will switch off after
approx. 3 seconds.
Q
Displaying the date
j Press the START button
2
while the watch is in time mode. The
date appears on the display.
j Release the START button
2
to return to time mode.
Q
Setting the alarm
j Press the MODE button
6
twice to enter the alarm mode. The
hour field of the alarm time flashes in the display.
j Press the START button
2
to set the desired hour value.
j Press the RESET button
4
to confirm your setting. The minute
field flashes in the display.
j Press the START button
2
to set the desired minute value.
j Press the RESET button
4
to confirm your setting.
j Press the MODE button
6
to enter the time mode.
Q
Switching the alarm on / off
j Switch the alarm on or off by pressing and keeping pressed the
START button
2
and the RESET button
4
while in time mode. If
the alarm is switched on, the alarm symbol
7
appears in the
display.
j When the alarm sounds, you can activate the Snooze function
by pressing the START button
2
. The alarm sounds again after 4
Q
Setting the time and date
1. Press the MODE button
6
three times. The second field
5
and
the day of the week field
1
flash in the display.
2. Press the START button
2
to set the second field
5
to 0.
3. Press the RESET button
4
to confirm your setting. The minute
field flashes in the display.
4. Press the START button
2
to set the desired minute value.
5. Press the RESET button
4
to confirm your setting. The hour field
flashes in the display.
6. Press the START button
2
to set the desired hour value.
Note: Pay attention to the symbols A, P and H
5
in the
display when setting the hour value. A and P (A = a.m. / P =
p.m.) are used for the 12-hour time format. H is used for the 24-
hour format. Press the START button
2
to set the desired value
and format. Press the RESET button
4
to confirm your setting.
7. Press the RESET button
4
to confirm your setting. The date field
flashes in the display.
8. Press the START button
2
to set the desired date value.
9. Press the RESET button
4
to confirm your setting. The month
field flashes in the display.
10. Press the START button
2
to set the desired month value.
11. Repeat steps 8 and 9 to set the day of the week
1
field. The
names of the days of the week are shortened as follows:
MO = Monday
TU = Tuesday
WE = Wednesday
TH = Thursday
FR = Friday
SA = Saturday
SU = Sunday
12. Press the MODE button
6
to enter the default display.
diately to prevent damage to the instrument.
J Avoid contact with skin, eyes and mucous membrane. In the
event of contact with battery acid, rinse the affected area with
plenty of water and /or consult a doctor.
Q
Water resistance
J This watch is water-resistant up to 3 bar in accordance with
DIN 8310.
3 bar water resistant
J Do not press any buttons if the watch comes into contact with
water.
Q
Replacing the battery
J Note: Have batteries changed in a specialist shop.
J Have any repairs or battery replacements carried out by a suita-
bly experienced specialist in order to avoid damaging the in-
sides of the watch.
J Dispose of used batteries in an environmentally compatible
manner.
J Do not dispose of the watch with the household rubbish.
Q
Operation
j Press the MODE button
6
to set the desired mode: Time mode
> Stop watch > Alarm > Setting the time > Time mode.
General Safety Instructions
KEEP ALL THE SAFETY ADVICE AND INSTRUCTIONS IN A SAFE
PLACE FOR FUTURE REFERENCE!
J
WARNING!
DANGER TO LIFE AND
RISK OF ACCIDENTS FOR INFANTS AND
CHILDREN! Never leave children unattended
with the packaging material. Packaging material can cause
suffocation.
WARNING!
DANGER TO LIFE! Batteries can be swallowed,
which can prove fatal. Consult a doctor immediately if anyone
swallows a battery.
J Never take the product apart on any account. Improper repairs
could cause considerable danger for the user. Only let qualified
people carry out any repairs.
Battery Safety Instructions
J CAUTION! RISK OF EXPLOSION! Never
recharge the batteries.
J Have a spent battery removed from the instrument immediately.
There is an increased risk of leakage.
J Batteries must not be disposed of in household waste.
J Consumers are under a legal obligation to dispose of batteries in
the proper way.
J Keep the battery out of the reach of children, do not dispose of
the battery in fire, do not short-circuit it, and do not take it apart.
J Failure to observe these instructions may result in the battery dis-
charging beyond its end voltage, which poses a risk of leakage. If
the battery in your instrument has leaked, have it removed imme-
Wristwatch
Q
Introduction
Familiarise yourself with the product before using it for
the first time. In addition please refer carefully to the
operating instructions below and the safety advice. Use
the product only as described and for the
indicated purpose. Keep
these instructions in a safe place. If you pass the product
on to anyone
else, please ensure that you also pass on all the documentation.
Q
Proper use
The wrist watch displays the time and date. It also has an alarm and
can be used as a stopwatch. Other uses or modification
of the product
shall be considered as improper use and may lead to injury
or damage.
The manufacturer will not accept liability for loss or damage arising
from improper use. The product is not intended for commercial use.
Q
Description of parts
1
Day of the week display field
2
START button
3
Time field
4
RESET button
5
Second field / “H” indicator
6
MODE button
7
Alarm symbol
8
LIGHT button
9
“A” / “P” indicator
Z30483A /
Z30483B/
Z30483C/
Z30483D
WRISTWATCH
Operation and Safety Notes
RUČNI SAT
Opslužne i sigurnosne upute
CEAS DE MÂNĂ
Instrucţiuni de utilizare şi de siguranţă
РЪЧЕН ЧАСОВНИК
Инструкции за обслужване и безопасност
ΡΟΛΟΪ ΧΕΙΡΟΣ
Υποδείξει χειρισού και ασφάλεια
7
Z30483A
Z30483B
Z30483C
Z30483D
9
EMC
9
EMC
9
77141_RO_GR_CY.indd 1 7/3/2012 6:46:53 PM


Alăturați-vă conversației despre acest produs
Aici puteți împărtăși ce părere aveți despre Auriol IAN 77141 Ceas de mana. Dacă aveți o întrebare, citiți mai întâi cu atenție manualul. Solicitarea unui manual se poate face folosind formularul nostru de contact.