
4
DZIĘKUJEMY ZA WYBÓR MARKI ZELMER.
ŻYCZYMY SATYSFAKCJI Z UŻYTKOWANIA URZĄDZENIA.
OSTRZEŻENIE
PRZED UŻYCIEM PRODUKTU NALEŻY UWAŻNIE PRZECZYTAĆ INSTRUKCJĘ
UŻYTKOWANIA. PRZECHOWUJ JĄ W BEZPIECZNYM MIEJSCU DO WYKORZYSTANIA W
PRZYSZŁOŚCI
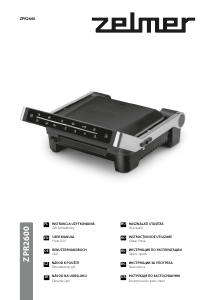
OPIS
1. Uchwyt
2. Panele sterowania
3. Górna pokrywa
4. Płyta z nieprzywierającą powłoką
5. Lampka stanu gotowości
6. Lampka wł./wył.
7. Czujnik temperatury
8. Tacka na tłuszcz
9. Dolna część
INSTRUKCJE BEZPIECZEŃSTWA
Jeżeli przewód zasilający jest uszkodzony, aby
uniknąć zagrożenia musi on zostać wymieniony przez
producenta, autoryzowany serwis lub odpowiednio
wykwalikowaną osobę.
Z tego urządzenia mogą korzystać dzieci w wieku 8 lat
i starsze oraz osoby o ograniczonej sprawności
zycznej, sensorycznej i umysłowej oraz osoby
nieposiadające wystarczającego doświadczenia pod
warunkiem, że będą one nadzorowane lub zostaną
poinstruowane w zakresie bezpiecznej obsługi
urządzenia i będą rozumiały zagrożenia związane z
taką obsługą. Nie należy dopuszczać, aby dzieci
bawiły się urządzeniem. Czyszczenie i konserwacja
urządzenia nie mogą być dokonywane przez dzieci,
chyba że mają więcej niż 8 lat i są pod nadzorem.
Urządzenie i przewód trzymać poza zasięgiem dzieci
poniżej 8. roku życia.
Urządzenie jest przeznaczone do użytku na
maksymalnej wysokości 2000m n.p.m..
Urządzenia nie są przeznaczone do pracy z
zewnętrznymi zegarami lub niezależnymi systemami
zdalnego sterowania.
Urządzenie należy czyścić według wskazówek
znajdujących się w sekcji dotyczącej czyszczenia i
konserwacji.
WAŻNE OSTRZEŻENIA
Nieprawidłowe użycie lub niewłaściwe obchodzenie się z produktem spowoduje
unieważnienie gwarancji.
Przed podłączeniem urządzenia do sieci sprawdzić, czy napięcie zasilania jest takie samo, jak
wskazane na tabliczce znamionowej urządzenia.
W trakcie użytkowania przewód zasilający nie może być splątany ani owinięty wokół produktu.
Nie używać, nie podłączać ani nie odłączać urządzenia od sieci, mając mokre dłonie i/lub stopy.
Nie ciągnąć za przewód zasilający w celu odłączenia urządzenia. Nie używać przewodu jako
uchwytu.
W przypadku jakiejkolwiek awarii lub uszkodzenia natychmiast odłączyć urządzenie od sieci i
skontaktować się z ocjalnym działem wsparcia technicznego. Aby zapobiec jakiemukolwiek
niebezpieczeństwu, nie należy otwierać obudowy urządzenia. Naprawy lub procedury
dotyczące urządzenia może wykonywać tylko wykwalikowany personel z ocjalnego działu
wsparcia technicznego marki.
To urządzenie jest przeznaczone wyłącznie do użytku domowego wewnątrz pomieszczeń.
Eurogama Sp. z o.o. nie ponosi odpowiedzialności za jakiekolwiek szkody lub urazy, które
mogą wystąpić na osobach, zwierzętach lub przedmiotach z powodu nieprzestrzegania tych
ostrzeżeń.
INSTRUKCJA UŻYTKOWANIA
Przed użyciem
Upewnij się, że całe opakowanie zostało usunięte z produktu.
Naciśnij przycisk zwalniający na górnej pokrywie, aby wyjąć górną płytę grilla. Następnie
naciśnij przycisk zwalniający na części dolnej, aby wyjąć dolną płytę grilla.
Płyty grilla i tackę na tłuszcz czyścić w ciepłej wodzie z płynem do mycia naczyń; spłukać i
pozostawić do wyschnięcia. Części te można również myć w zmywarce.
PODSTAWY NIGDY NIE ZANURZAJ ANI NIE WYSTAWIAJ NA DZIAŁANIE WODY.
Przed użyciem urządzenia umieść z powrotem na swoim miejscu górną i dolną płytę. Bardziej
szczegółowe instrukcje można znaleźć w części „Wkładanie / wymiana płyt” poniżej.
UWAGA: Przy pierwszym użyciu płyt, spryskać lub nałożyć papierowym ręcznikiem cienką
warstwę oleju spożywczego na powierzchnie nieprzywierające płyt w celu przygotowania
powierzchni. W razie konieczności, powtórzyć nakładanie cienkiej warstwy oleju spożywczego
w okresie użytkowania płyt, po to aby utrzymać dobrą powierzchnię nieprzywierającą.
Umieść urządzenie na czystej, płaskiej, równej, stabilnej i odpornej na ciepło powierzchni,
pozostawiając przynajmniej 10-15 centymetrów odstępu wokół urządzenia, tak aby umożliwić
prawidłową cyrkulacją powietrza.
Montaż górnej pokrywy:
Pozycja zamknięta / gotowania:
Górna pokrywa jest zamknięta i spoczywa na podstawie. W tej pozycji należy uruchomić
urządzenie / podgrzewać jedzenie i przygotowywać większość potraw.
Otwarte: Umieść jedzenie do przygotowania w tej pozycji, aby rozpocząć gotowanie. W
przypadku żywności, która nie korzysta z górnego grilla, takiej jak pizza lub ryba, podnieś
pokrywę za pomocą uchwytu grillowego, tak aby pozostawić ją w położeniu około 90º do
podstawy.
Wkładanie / wymiana płyt:
Wsuń rowki znajdujące się z tyłu dolnej płyty w zaciski mocujące, a następnie naciśnij na przód
płyty, aby wpasować ją na miejsce. Powtórz tę procedurę, aby włożyć górny grill.
POUCZENIE: Płyty grillowe i metalowe powierzchnie górnej pokrywy i uchwytu nagrzewają się
podczas użytkowania. Aby uniknąć ryzyka poparzenia, podczas korzystania z grilla należy
używać rękawic ochronnych lub rękawic żaroodpornych. Można dotykać tylko czarnej części
uchwytu i panelu sterowania.
OSTRZEŻENIE: Do dodawania / zdejmowania potraw z grilla należy używać wyłącznie
drewnianych, plastikowych lub silikonowych żaroodpornych przyborów kuchennych. Nie
używaj metalowych przyborów kuchennych, ponieważ mogą one porysować powierzchnię
grilla.
UWAGA: Przy pierwszym użyciu produkt może dymić. Jest to normalne, a dym zniknie przy
kolejnym użyciu.
Grille kontaktowe:
Używać ich do przygotowania hamburgerów, cienkich lub bezkostnych kawałków mięsa, ryb i
warzyw. W pozycji „Zamknięte" potrawy zostaną przygotowane szybko, ponieważ są pieczone
z obu stron w tym samym czasie.
Korzystanie z panelu sterowania:
Interfejs panelu ma przycisk On/O (Wł./Wył.) (O/I), przycisk start i anuluj oraz dwa rzędy do
wybierania potraw (przyciski dotykowe), z kontrolkami wyboru i podgrzewania .
Szczegółowe instrukcje dla każdego przycisku są podane poniżej:
Sześć trybów gotowania:
Burger, Kurczak, Kanapka, Kiełbasa, Mięso, Ryba i M (Ręczny)
2. Przycisk On/O (Wł./Wył.) (O/I):
Po naciśnięciu przycisku On/O (Wł./Wył.) zapala się lampka zasilania wraz z innymi
kontrolkami na interfejsie. Po kilku sekundach świeci się tylko lampka trybu przygotowania
potrawy (Burger, Kurczak, Kanapka, Kiełbasa, Mięso, Ryba i M (Ręczny)), a grill jest w trybie
czuwania.
Aby wyłączyć grill, naciśnij ponownie przycisk On/O (Wł./Wył.), a wszystkie kontrolki wyłączą
się. Przyciski nie mają funkcji pamięci. W związku z tym po wyłączeniu interfejsu startowego
urządzenie powróci do trybu początkowego. Przycisk On/O (Wł./Wył.) świeci się przez cały
proces gotowania. Jeśli przycisk On/O (Wł./Wył.) zostanie wciśnięty podczas
przygotowywania potrawy, grill wyłączy się, nawet jeśli proces nie został zakończony.
3. Podgrzewanie :
Po naciśnięciu przycisku Start zapala się kontrolka, a urządzenie jest w trybie czuwania. W tym
samym czasie kontrolki (Burger, Kurczak, Kanapka, Kiełbasa, Mięso, Ryba i M (Ręczny)) świecą się
do momentu wybrania rodzaju przygotowywanego jedzenia.
Na przykład, jeśli wybrano „Burger", ta kontrolka nie gaśnie, a pozostałe światełka trybu
gotowania wyłączają się; pod białym paskiem miga przycisk podgrzewania i przycisk On/O
(Wł./Wył.).
Po naciśnięciu przycisku „Start/Anuluj”, przyciski „Burger”, „Podgrzewanie" i „Start/Anuluj:
migają w tym samym czasie, a grill zaczyna się rozgrzewać. Po zakończeniu podgrzewania
wstępnego pięciokrotnie słyszalny jest brzęczyk (częstotliwość wynosi 1Hz. Pierwsze cztery
brzęczenia są krótkie, a ostatnie brzęczenie trwa 2 sekundy).
Kontrolki przycisków „Burger" i „Podgrzewanie" pozostają podświetlone, a tryb
„Podgrzewania” został zakończony.
UWAGA DOTYCZĄCA PRZYGOTOWYWANIA MIĘSA I RYB:
Przy wyborze jednego z trybów „Mięso” lub „Ryba” (na przykład „Mięso”, kontrolka pozostaje
zapalona, podczas gdy inne przyciski wyboru trybu gotowania wyłączają się. Pod białym
paskiem miga kontrolka „Podgrzewania” i przycisk „Start/Anuluj”).
Po naciśnięciu przycisku „Start/Anuluj" migają trzy przyciski „Mięso", „Podgrzewanie” i
„Start/Anuluj" w tym samym czasie, a grill zaczyna się rozgrzewać.
Po zakończeniu podgrzewania wstępnego pięciokrotnie słyszalny jest brzęczyk (częstotliwość
wynosi 1Hz. Pierwsze cztery brzęczenia są krótkie, a ostatnie brzęczenie trwa 2 sekundy).
Zapalają się kontrolki na przyciskach „Mięso" i „Podgrzewanie”. Tryby przygotowania potrawy
Rare (Słabo Wysmażone) / Medium (Średnio Wysmażone) / Done „Wysmażone” i Well-done
(Dobrze Wysmażone) zaczynają migać. Została zakończona faza podgrzewania.
4. Wybór trybu przygotowania potrawy:
Jeśli na przykład wybrany zostanie tryb „Burger”:
Po zakończeniu podgrzewania wstępnego pięciokrotnie słyszalny jest brzęczyk (częstotliwość
wynosi 1Hz. Pierwsze cztery brzęczenia są krótkie, a ostatnie brzęczenie trwa 2 sekundy).
Kontrolki „Burger” i „Podgrzewanie” będą się świecić przez pewien czas. Zaraz potem zacznie
migać przycisk „Start/Anuluj". Tryb podgrzewania wstępnego został zakończony.
Umieść burgera na grillu i naciśnij przycisk „Start/Anuluj”. Teraz kontrolki „Burger”,
„Wysmażone” i „Start/Anuluj" świecą się przez pewien czas. W tym samym czasie centralny
pasek gotowania zaczyna poruszać się od lewej do prawej podczas procesu przygotowywania
potrawy.
Po zakończeniu procesu przygotowywania potrawy pięciokrotnie słyszalny jest brzęczyk
(częstotliwość wynosi 1Hz. Pierwsze cztery brzęczenia są krótkie, a ostatnie brzęczenie trwa 2
sekundy).
Gdy użytkownik wybierze „Mięso” lub „Ryba” po etapie podgrzewania wstępnego, zaczynają
migać cztery poziomy gotowania znajdujące się poniżej białego paska. Użytkownik może
wybrać preferowany poziom gotowania. Na przykład, jeśli wybrano opcję DONE
(WYSMAŻONE), kontrolki świetlne pozostałych trzech poziomów wyłączają się razem z
kontrolką „Podgrzewania”. Kontrolka „Start/Anuluj” zaczyna migać.
Po naciśnięciu przycisku „Start/Anuluj” zapalą się przyciski „Mięso” / „Wysmażone” i
„Start/Anuluj”, a centralny pasek gotowania zaczyna poruszać się od lewej do prawej. Po
zakończeniu procesu przygotowywania potrawy pięciokrotnie słyszalny jest brzęczyk
(pierwsze cztery brzęczenia są krótkie, a ostatnie brzęczenie jest długie).
Po zakończeniu procesu gotowania system powraca do trybu czuwania. Aby anulować
program gotowania, naciśnij przycisk „Start/Anuluj” podczas przygotowywania potrawy, a
grill powróci do trybu czuwania.
5. Rozmrażanie:
Jeśli jedzenie jest zamrożone, czas gotowania będzie inny. W związku z tym należy wybrać
przycisk „Rozmrażanie". Czas gotowania zwiększa się o 2 minuty. Na przykład wybierz
„Rozmrażanie" + „Mięso"+ „Done” (Wysmażone). Czas gotowania wyniesie 7 minut. Przycisk
rozmrażania musi być używany w połączeniu z trybem wyboru żywności. Po naciśnięciu
przycisku wyboru żywności można nacisnąć przycisk rozmrażania. Aby anulować tryb
rozmrażania, ponownie naciśnij przycisk „Rozmrażanie”.
6. Tryb ręczny (M):
W menu wyboru trybu przygotowania potrawy, po naciśnięciu przycisku „M” (Ręczne), górny i
dolny rząd przycisków wyłączają się. Migają kontrolki przycisków „M” i „Start/Anuluj”. Jeśli
przycisk start/anuluj zostanie wciśnięty teraz, zaświecą się kontrolki przycisku sterowania
ręcznego „M” oraz przycisk „Start/Anuluj”. Oznacza to, że użytkownik może rozpocząć
gotowanie w trybie ręcznym. Ponownie naciśnij przycisk „Start/Anuluj” podczas gotowania, a
urządzenie powróci do trybu czuwania. Jeśli przez ponad 30 minut nie zostaną naciśnięte
żadne przyciski, urządzenie automatycznie przełączy się w tryb uśpienia, a ekran interfejsu
wyłączy się. Przycisk On/O (Wł./Wył.) musi zostać ponownie wciśnięty, aby ponownie
aktywować urządzenie, które zmieni się w tryb startowy.
Tryb ręczny jest używany oddzielnie, bez łączenia trybów wyboru żywności, rozmrażania lub
gotowania.
7. Start / Anuluj:
Po wybraniu trybu gotowania naciśnij przycisk „Start/Anuluj”, aby rozpocząć gotowanie. Jeśli
tryb gotowania nie został ukończony w połowie procesu, naciśnij ponownie przycisk
„Start/Anuluj”, aby powrócić do trybu czuwania.
8. Gotowanie zakończone:
Po zakończeniu wybranego trybu automatycznego gotowania pięciokrotnie słyszalny jest
brzęczyk (pierwsze cztery brzęczenie są krótkie, a ostatnie jest długie), a grill powraca do trybu
czuwania.
9. Tryb uśpienia:
Po przejściu urządzenia w tryb czuwania, jeśli przez ponad 30 minut nie zostaną naciśnięte
żadne przyciski, urządzenie automatycznie przełączy się w tryb uśpienia, a ekran interfejsu
wyłączy się. Naciśnij ponownie przycisk On/O (Wł./Wył.), aby aktywować urządzenie i
powrócić do trybu startowego.
Po wybraniu trybu gotowania, jeśli przycisk start/anuluj nie zostanie naciśnięty, aby rozpocząć
podgrzewanie wstępne w ciągu 30 minut, urządzenie przełączy się w tryb uśpienia.
10. Błąd pracy:
W przypadku braku kontaktu, zwarcia lub uszkodzenia wewnętrznego urządzenie automatycznie
przestanie działać, a wszystkie kontrolki będą migać ze stałą częstotliwością 1 HZ.
JAK DZIAŁA PASEK POSTĘPU?
Na interfejsie panelu znajduje się pasek postępu z diodami LED w dolnej części, który wskazuje
poziom gotowania, jak pokazano poniżej:
Wyświetlacz paska postępu:
Pasek postępu jest podzielony na cztery obszary: zielony, żółty, pomarańczowy i czerwony, a
kolor odpowiadający diodom LED jest ustalany w dolnej części.
W trybie czuwania światła nie świecą się, ponieważ pasek postępu zapala się tylko podczas
gotowania.
Na przykład w trybie „Mięso” + „Medium” (średnio wysmażone) naciśnij przycisk
„Start/Anuluj”, aby rozpocząć gotowanie. Teraz dioda LED1 zacznie migać przez pewien czas.
Gdy dioda LED1 przestanie migać i pozostanie zapalona, zacznie migać dioda LED2. Po tym
samym okresie czasu, co dla LED1, LED2 również zacznie świecić światłem ciągłym, a migać
zaczynie LED3, i tak dalej, aż migać zacznie ostatnia dioda LED w czerwonym obszarze.
Przed zakończeniem procesu gotowania zacznie migać ostatnia dioda LED, aż do momentu,
kiedy zacznie świecić światłem ciągłym. Po zakończeniu procesu gotowania wszystkie diody
LED na pasku postępu pozostaną zapalone i pięciokrotnie słyszalny będzie sygnał brzęczyka.
Natychmiast po tym grill powraca do trybu czuwania.
Wyświetlacz paska postępu w trybie M (Ręczny):
Pasek postępu jest ustawiony na miganie po 15 minutach. Gdy ostatnia dioda LED zacznie
migać, gotowanie będzie kontynuowane do momentu ponownego naciśnięcia przycisku
start/anuluj lub przejścia w tryb uśpienia po 30 minutach, jeśli wcześniej nie zostanie naciśnięty
żaden przycisk.
Dioda LED paska postępu będzie migać raz na sekundę.
KONSERWACJA I CZYSZCZENIE
Przed czyszczeniem urządzenia należy je wyłączyć i odłączyć od sieci.
Nie zanurzaj urządzenia ani kabla zasilającego w wodzie ani innych płynach. Nie myć w
zmywarce.
Grill wyczyść wilgotną szmatką i niewielką ilością płynu do mycia naczyń. Nie używaj ściernych
środków myjących, stalowej wełny, przedmiotów metalowych, ostrych środków czyszczących
lub środków dezynfekujących. Mogą one spowodować uszkodzenie urządzenia.
Urządzenie należy czyścić, a wszystkie ślady jedzenia usuwać w regularnych odstępach czasu.
Jeśli urządzenie nie jest czyszczone i konserwowane prawidłowo, powierzchnia może się
zużywać. Wpłynie to na żywotność urządzenia i może spowodować niebezpieczne sytuacje.
PL
THANK YOU FOR CHOOSING ZELMER AND WE HOPE
THAT THE PRODUCT MEETS YOUR NEEDS.
PLEASE NOTE
READ THE INSTRUCTIONS CAREFULLY BEFORE USING THE PRODUCT KEEP THEM IN A SAFE
PLACE FOR FUTURE REFERENCE.
DESCRIPTION
1. Handle
2. Decorative panels
3. Upper part
4. Non-stick grill plate
5. Ready light
6. On/o light
7. temperature sensor
8. Oil tray
9. Lower section
SAFETY INSTRUCTIONS
If the power cable is damaged, it must be replaced by
the manufacturer, their technical assistance service or
other qualied person
to prevent risks.
This appliance may be used by children over the age
of 8 years old, individuals with physical, intellectual or
sensory impairments, or persons without experience,
provided they are supervised or have received the
relevant instructions on the safe use of the appliance
and are aware of the risks entailed. Children must not
use the appliance as a toy. Cleaning and maintenance
by the user must not be performed by children, unless
they are over 8 years old, and always under
supervision.
Keep the appliance and the power cable out of reach
of children under the age of 8 years.
This device is designed for use at a maximum altitude
of 2000 m above sea level.
The appliances are not designed to function with
external timers or independent remote control
systems.
To clean the appliance, observe the instructions
given in the manual in the section on care and
cleaning.
IMPORTANT INFORMATION
Any incorrect or inadequate handling of the product will void the warranty.
Before connecting the product, check that the mains voltage is the same as that shown on the
product label.
The power connection cable must not be tangled or rolled around the product during use.
Do not use the device or connect or disconnect the power supply with wet hands and/or feet.
Do not pull on the power cable to unplug it. Do not use the cable as a handle.
Disconnect the product from the mains supply immediately in the event of faults or damage,
and contact the authorized technical assistance service. To prevent risks or hazards, do not
open the appliance. Only qualied technicians from the ocial technical assistance service for
the brand may carry out repairs or other operations to the appliance.
This device is intended solely for domestic use and indoors.
B&B TRENDS, S.L. accepts no responsibility for damage or injury to persons, animals or objects
due to a failure to observe the above warnings.
INSTRUCTIONS FOR USE
Prior to use
Make sure that all the packaging has been removed from the product.
Press the release button on the upper plate to remove the upper grille plate. Then press the
release button on the lower plate to remove the lower grille plate.
Clean the grille plates, the grease collection tray and the scraper / cleaning tool in warm soapy
water; rinse and allow to dry. These parts can also be washed in the dishwasher.
NEVER IMMERSE OR EXPOSE THE BASE TO WATER.
Replace the upper and lower grille plates in their respective positions prior to using the device.
See the section "Inserting / Replacing plates" below for more detailed instructions.
NOTE: On using the plates for the rst time, spray or apply a ne coat of cooking oil over the
non-stick surfaces of the plates with a paper towel to season the surface. If necessary, repeat
the application of the ne coat of cooking oil during the service life of the plates to maintain a
good non-stick surface.
Place the appliance on a clean, at, level, stable and heat-resistant surface, leaving a space of at
least 10-15 centimetres around the device to allow the air to circulate correctly.
Fitting the upper cover:
Closed / cooking position:
The upper cover is closed and rests on the Base. Use this position to start the device / heat the
food and when cooking most foods.
Open: Place the food to be cooked in this position to start cooking. For food which does not
use the upper grill such as pizza or sh, lift the cover with the grill handle to leave it at
approximately 90º to the base.
Inserting / changing plates:
Slide the grooves at the rear of the lower plate onto the retention clips, then press down on the
front of the plate to t it into place. Repeat this procedure to insert the upper grill.
INSTRUCTIONS FOR USE
CAUTION: The grill plates and the metal surfaces of the upper cover and the handle heat up
during use. To avoid the risk of burns, use protective oven gloves or heat-resistant gloves when
using the grill and only touch the black part of the handle and the control panel.
WARNING: Only use wooden, plastic or silicone heat-resistant cooking utensils to add /
remove food from the grill. Do not use metal utensils as these may scratch the surface of the
grill.
NOTE: When rst used, the product may give o smoke. This is normal and the smoke will
disappear with subsequent use.
Contact grills:
Use these to cook burgers, thin or boned pieces of meat, sh and vegetables. In the "Closed"
position, food will cook quickly as both sides are cooked at the same time.
Use of the control panel:
The panel interface has an On/O button (O/I), start and cancel button , and two rows for
selecting food by scrolling up or down (touch-sensitive buttons), with selection and preheating
indicator lights .
The specic instructions for each button are given below:
Six cooking modes:
Burger, Chicken, Sandwich, Sausage, Meat, Fish and M (Manual)
2. On/O button (O/I):
When the On /O button is pressed, the power light comes on together with the other indicator
lights on the interface. After a few seconds, only the cooking mode lights (Burger, Chicken,
Sandwich, Sausage, Meat, Fish and M) remain lit, and the grill is in standby mode.
To switch o the grill, press the On/O button again and all the indicator lights will switch o.
The buttons do not have a memory function. Therefore, once the start interface has been
switched o, the appliance will return to the initial mode. The On/O button remains lit
throughout the cooking process. If the On/O button is pressed during cooking, the grill will
switch o even though the process has not been completed.
3. Preheating :
When the Start button is pressed, the light comes on and the appliance is in standby mode. At
the same time, the indicator lights (Burger, Chicken, Sandwich, Sausage, Meat, Fish and M)
remain lit until the type of food to be cooked has been selected.
For example, if “Burger” is selected, the light remains lit and the other cooking mode lights
switch o; below the white bar, the preheating button ashes and the “On/o” button ashes).
On pressing the “start/cancel” button, the “Burger”, “Preheating”, and “Start/cancel” button
ash at the same time and the grill starts to preheat. On completion of the preheating, a buzzer
is heard ve times (the frequency is 1Hz. The rst four buzzes are short and the last buzz is 2
seconds long).
The lights for the “Burger” and “Preheating” buttons remain lit and the “Preheating” mode has
nished.
NOTE WHEN COOKING MEAT AND FISH:
On selecting either of the modes “Meat” or “Fish” (for example, “Meat”, the light “ ” remains
lit, while the other cooking selection mode buttons switch o. Below the white bar, the
“Preheating” light ashes and the “start/cancel” button ashes).
On pressing the “start/cancel” button, the three “Meat”, “Preheating”, and “Start/cancel”
buttons ash at the same time and the grill starts to preheat.
On completion of the preheating, a buzzer is heard ve times (the frequency is 1Hz. The rst
four buzzes are short and the last buzz is 2 seconds long).
The lights on the “Meat” and “Preheating” buttons come on. The cooking modes Rare / Medium
/ Done and Well-done start to ash, and the preheating phase has ended.
4. Cooking mode selection:
If, for example, the “Burger” cooking mode is selected:
On completion of the preheating, a buzzer is heard ve times (the frequency is 1Hz. The rst
four buzzes are short and the last buzz is 2 seconds long). The Burger and Preheating lights will
light up for a time. Immediately afterwards the “start/cancel” button ashes and the preheating
mode will have nished.
Place the burger on the grill and press the “start/cancel” button. Now the “Burger”, “done” and
“start/cancel” lights remain lit for a time; at the same time, the central cooking bar starts to
move from left to right during the cooking process.
On completion of the cooking process, a buzzer is heard ve times (the frequency is 1Hz. The
rst four buzzes are short and the last buzz is 2 seconds long).
When the user selects “Meat” or “Fish” after the preheating stage, the four cooking levels below
the white bar start to ash. The user can select the preferred cooking level. For example, if
DONE is selected, the lights for the other three levels switch o, together with the “Preheating”
light. The start/cancel” light ashes.
After pressing the “start/cancel” button, the “Meat” / “Done” and “start/cancel” buttons light
up, and the central cooking bar starts to move from left to right. On completion of the cooking
process, a buzzer is heard ve times (the rst four buzzes are short and the last buzz is long).
On completion of the cooking process, the system returns to standby mode. To cancel a
cooking programme, press the “start/cancel” button during the cooking and the grill will return
to standby mode.
5. Defrost:
If the food is frozen, the cooking times will be dierent. Therefore, the “Defrost” button must be
selected. The cooking time is increased by 2 minutes. For example, select “Defrost” + “Meat” +
“Done”. The cooking time will be 7 minutes. The defrost button must be used in combination
with a food selection mode. After pressing the food selection button, the defrost button can be
pressed. To cancel the defrost mode, press the “Defrost” button again.
6. Manual Mode (M):
In the cooking selection menu, if the button “M” (Manual) is pressed, the two top and bottom
rows of buttons switch o. The lights for the” M” and “start/cancel” buttons ash. If the
start/cancel button is pressed now, the lights for the “M” manual button and the “start/cancel”
button light up. This indicates that the user can start cooking in manual mode. Press the
“start/cancel” button again during cooking and the appliance will return to standby mode. If no
buttons are pressed for more than 30 minutes, the appliance automatically switches to Sleep
mode, and the interface screen switches o. The On/o button must be pressed again to
reactivate the appliance which will change to Start mode.
The manual mode is used separately, without combining food selection, defrost or cooking
time modes.
7. Start / Cancel:
After selecting the cooking mode, press “start/cancel” to start cooking. If the cooking mode has
not been completed halfway through the process, press the “start/cancel” button again to
return to standby.
8. Cooking nished:
At the end of the automatic cooking mode selected, a buzzer is heard ve times (the rst four
buzzes are short and the last one is long), and the grill returns to standby mode.
9. Sleep mode:
After the appliance has entered standby mode, if no buttons are pressed for more than 30
minutes, the machine automatically switches to sleep mode and the interface screen switches
o. Press the On/o button again to activate the machine and return to start mode.
After selecting the cooking mode, if the start/cancel button is not pressed to start the
preheating within 30 minutes, the appliance switches to sleep mode.
10. Operating error:
In the event of no contact, a short circuit or internal damage, the appliance will automatically
stop working and all the indicator lights will ash at a constant frequency of 1 HZ.
HOW DOES THE PROGRESS BAR FUNCTION?
On the panel interface is a progress bar with LED lights on the lower section which indicates the
cooking level, as shown below:
Progress bar display:
The progress bar is divided into four areas: green, yellow, orange and red, and the colour
corresponding to the LED lights is established in the lower section.
In standby mode, the lights are not lit, as the progress bar only lights up during cooking.
For example, in “Meat” + “Medium” mode, press the “start/cancel” button to start cooking.
Now, LED1 will start to ash for a period of time. When LED1 stops ashing and remains lit, LED2
starts to ash. After the same period of time as for LED1, LED2 also remains lit while LED3 starts
to ash, and so forth until the last LED in the red area starts to ash.
Before the end of the cooking process, the last LED will ash until it remains lit. On completion
of the cooking process, all the LED lights on the progress bar will be lit and ve buzzes are
heard. Immediately afterwards, the grill returns to standby mode.
Progress bar display in M (Manual) mode:
The progress bar is set to ash after 15 minutes. When the last LED ashes, cooking will
continue until the start/cancel button is pressed again or it goes to sleep mode, after 30 min if
no button has been pressed before.
The progress bar LED will ash once per second.
MAINTENANCE AND CLEANING
Before cleaning the appliance, switch it o and disconnect it from the mains.
Do not immerse the appliance or the power cable in water or other liquids. Do not wash in the
dishwasher.
Clean the grill with a damp cloth and a small quantity of dishwasher soap. Do not use abrasive
washing agents, steel wool, metal objects, hot cleaning agents or disinfectants. These may
damage the appliance.
The appliance should be cleaned and all traces of food removed at regular intervals.
If the appliance is not cleaned and maintained correctly, the surface may wear. This will aect
the service life of the appliance and may result in hazardous situations.



Alăturați-vă conversației despre acest produs
Aici puteți împărtăși ce părere aveți despre Zelmer ZPR2600 Grătar electric. Dacă aveți o întrebare, citiți mai întâi cu atenție manualul. Solicitarea unui manual se poate face folosind formularul nostru de contact.