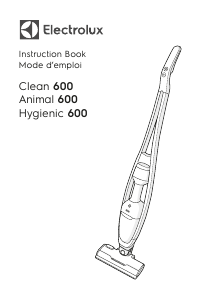
Manual Electrolux PD91-6BP Aspirator
Ai nevoie de un manual pentru Electrolux PD91-6BP Aspirator? Mai jos puteți vizualiza și descărca manualul PDF gratuit în limba română. Acest produs are în prezent 10 întrebări frecvente, 0 comentarii și are 0 voturi. Dacă acesta nu este manualul dorit, vă rugăm să ne contactați.
Produsul dvs. s-a defectat și manualul nu oferă nicio soluție? Mergeți la Repair Café pentru servicii de reparații gratuite.
Manual
Loading…


Loading…
Evaluare
Spuneți-ne ce părere aveți despre Electrolux PD91-6BP Aspirator, lăsând o evaluare a produsului. Doriți să împărtășiți experiența dvs. cu acest produs sau să adresați o întrebare? Lăsați un comentariu în partea de jos a paginii.Mai multe despre acest manual
Înțelegem că este plăcut să aveți un manual pe hârtie pentru Electrolux PD91-6BP Aspirator. Puteți oricând descărca manualul de pe site-ul nostru web și îl puteți imprima singur. Dacă doriți să aveți un manual original, vă recomandăm să contactați Electrolux. S-ar putea să ofere un manual original. Căutați manualul dvs. Electrolux PD91-6BP Aspirator într-o altă limbă? Alegeți limba preferată pe pagina noastră de pornire și căutați numărul de model pentru a vedea dacă îl avem disponibil.
Specificații
| Marcă | Electrolux |
| Model | PD91-6BP |
| Categorie | Aspiratoare |
| Tip fișier | |
| Mărime fișier | 6.04 MB |
Toate manualele pentru Electrolux Aspiratoare
Mai multe manuale pentru Aspiratoare
Întrebări frecvente despre Electrolux PD91-6BP Aspirator
Echipa noastră de asistență caută informații utile despre produs și răspunde la întrebările frecvente. Dacă descoperiți o inexactitate în întrebările frecvente, vă rugăm să ne anunțați utilizând formularul de contact.
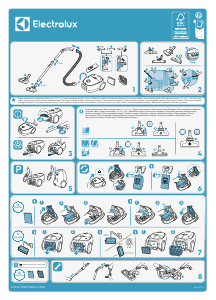
Furtunul aspiratorului meu este înfundat, ce pot face? Verificat
Desprindeți furtunul și uitați-vă prin el pentru a determina dacă este înfundat. Dacă acesta este cazul, puteți lua un obiect lung, cum ar fi un bețișor de mătură și îl puteți împinge cu grijă prin furtun. Acest lucru va elimina, în general, orice obiect care înfundă furtunul. Dacă acest lucru nu a ajutat, trebuie să contactați producătorul.
A fost util (1464) Citeşte mai multCe dimensiuni există sac de praf? Verificat
Există două dimensiuni care trebuie luate în considerare. În primul rând este dimensiunea plăcii cu intrarea în sac. Aceasta determină dacă punga de praf se va potrivi unui anumit aspirator. Apoi, există dimensiunea sacului. Acest lucru este indicat mai ales în litri și determină cât de mult praf poate ține sacul.
A fost util (941) Citeşte mai multVreau să știu vârsta aparatului meu Electrolux. Cum să fac asta? Verificat
Puteți determina vârsta produsului dvs. utilizând numărul de serie. Acest lucru poate fi găsit pe dispozitivul dvs. Primul caracter al numărului de serie indică un an (adică: 1 = 2001), iar cele două caractere după aceea indică săptămâna producției (adică: 35 = săptămâna 35 din acel an). Deci, numărul de serie 13500016 indică faptul că aparatul este din săptămâna 35 a anului 2001.
A fost util (835) Citeşte mai multCablul de alimentare al aspiratorului meu nu se întoarce înapoi în dispozitiv, ce pot face? Verificat
Este posibil să existe o răsucire sau o pliere în cablu. Rulați complet cablul de câteva ori și derulați-l înapoi în dispozitiv sub îndrumarea mâinilor. Dacă acest lucru nu rezolvă problema, este posibil ca mecanismul de derulare a cablului să fie rupt. În acest caz, contactați producătorul sau un service de reparații.
A fost util (657) Citeşte mai multAspiratorul meu face un zgomot șuierător, ce pot face? Verificat
Această problemă este adesea cauzată de o pungă sau un filtru plin sau atunci când există o deschidere care permite aerului să intre în furtun. Verificați sacul de praf și filtrați-le și înlocuiți-le dacă este necesar. Verificați furtunul dacă există găuri sau conexiuni defecte. Dacă acest lucru nu rezolvă problema, contactați producătorul.
A fost util (551) Citeşte mai multCum pot elimina praful și părul de pe capul periei aspiratorului? Verificat
Îndepărtarea prafului și a părului de pe capul periei aspiratorului se face manual. Dacă acest lucru nu merge așa cum se dorește, este posibil să folosiți un pieptene fin pentru a îndepărta murdăria rămasă.
A fost util (536) Citeşte mai multCe setare pe capul periei aspiratorului ar trebui să folosesc? Verificat
Aproape toate aspiratoarele au un cap cu o perie reglabilă. Folosiți peria pentru suprafețe dure pentru a preveni zgârieturile și deteriorarea. Opriți peria pentru covoare și covoare.
A fost util (419) Citeşte mai multPot folosi o pungă de praf de hârtie de mai multe ori? Verificat
Acest lucru nu este recomandabil. Porii wat-ului sacului se vor satura, provocând o pierdere a aspirației și eventual deteriorând motorul.
A fost util (286) Citeşte mai multCe este HEPA? Verificat
HEPA reprezintă aerul cu particule de înaltă eficiență. Multe aspiratoare au un filtru HEPA. Un filtru HEPA va opri cel puțin 85% și cel mult 99,999995% din toate particulele de 0,3 micrometri (µm) sau mai mult.
A fost util (258) Citeşte mai multPot folosi un aspirator obișnuit pentru a aspira cenușa? Verificat
Nu, acest lucru nu este absolut posibil. Cenușa care pare răcită poate fi încă caldă sau chiar fierbinte în interior. Un aspirator obișnuit nu este conceput pentru acest lucru și poate provoca un incendiu. De asemenea, filtrele aspiratoarelor obișnuite nu sunt întotdeauna potrivite pentru reținerea particulelor extrem de mici, cum ar fi cenușa. Poate ajunge apoi la motorul aspiratorului și poate provoca daune.
A fost util (251) Citeşte mai mult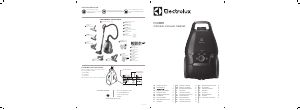

Alăturați-vă conversației despre acest produs
Aici puteți împărtăși ce părere aveți despre Electrolux PD91-6BP Aspirator. Dacă aveți o întrebare, citiți mai întâi cu atenție manualul. Solicitarea unui manual se poate face folosind formularul nostru de contact.