
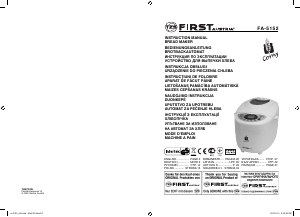
4 5
at the beginning. In this case, however, fruits and
nuts should be cut into smaller pieces.
SETTING THE TIMER
The timer function enables delayed baking. Using
the arrow keys ▲ and ▼, set the desired end
time for the baking operation. Select a program.
The display indicates the required baking time.
Using the arrow key ▲ you can change the end
time of baking operation in steps of 10 minutes
to a later point of time. Keep the arrow key
pressed to carry out this function faster. The
display shows the total duration of baking time
and the delayed time. If you overshoot while
changing the time, you can correct it using the
arrow key ▼. Confi rm the timer setting by means
of the Start/Stop button. The colon on the display
fl ashes and the programmed time starts to run.
When the baking process has been completed,
ten acoustic signals are issued and the display
indicates 0:00.
Example:
It is 8 a.m. and you would like fresh bread in
7 hours 15 minutes at 3.15 p.m. First select
program 1, then press the timer button until 7:15
appears on the display, as the time until the
bread is fi nished is 7 hours 15 minutes. Note that
the Timer function may not be available in jam
program.
Note
Do not use the timer function when working with
quickly spoiling ingredients such as eggs, milk,
cream or cheese.
BEFORE BAKING
For a successful baking process, please consider
the following factors:
INGREDIENTS
• Take the baking mould out of the housing,
before putting in the ingredients.
If ingredients reach the baking area, a fi re
may be caused by them heating up on the
heating elements.
• Always put the ingredients in the stated order
into the baking mould.
• All ingredients should have room temperature
to maintain an optimal rising result of the
yeast.
• Measure the ingredients precisely. Even
negligible deviations from the quantities
specifi ed in the recipe may affect the baking
results.
Note
Never use larger quantities than those specifi ed.
Too much dough can rise out of the baking
mould and drop onto the hot heating elements,
causing a fi re.
BAKING BREAD
PREPARATION
Observe the safety instructions in this manual.
Place the bread machine on an even and fi rm
base.
1. Pull the baking mould upward out of the
appliance.
2. Push the kneading paddles onto the drive
shafts in the baking mould. Make sure they
are fi rmly in place.
3. Put the ingredients for your recipe in the
stated order into the baking mould. First add
the liquids, sugar and salt, then the fl our,
adding the yeast as the last ingredient.
Note: Make certain that yeast does not come into
contact with salt or liquids.
The maximum quantities of the fl our and yeast
which may be used refer to the recipe.
4. Place the baking mould back in the
appliance. Make sure that it is positioned
properly.
5. Close the appliance lid.
6. Plug the power plug into the socket. An
acoustic signal sounds and the display
indicates the program number and the
duration of the normal program 1.
7. Select your program with the menu button.
Each input is confi rmed by an acoustic
signal.
8. Select the color of your bread. The marking
on the display shows whether you have
chosen light, medium or dark. You can also
select the setting „Rapid“ to shorten the
baking time.
Note
For programs 6,7,11, the functions „browning
degree“ and „Rapid“ are not available.
9. You now have the possibility of setting the
fi nish time of your program via the timer
function. You can enter a maximum delay of
up to 15 hours.
Note
This delayed function is not available for
program11.
STARTING A PROGRAM
Now start the program using the Start/Stop
button.
The program will automatically run various
operations. You can watch the program
sequence via the window of your bread baking
machine. Occasionally, condensation may occur
during baking in the window. The appliance lid
can be opened during kneading.
Note
Do not open the appliance lid during baking. The
bread can collapse.
ENGLISH
Tip: After 5 minutes of kneading, check the
consistency of the dough. It should be a soft,
sticky lump. If it is too dry, add some liquid to it. If
it is too moist, add some fl our (1/2 to 1 teaspoon
one or more times, as needed).
ENDING A PROGRAM
When the baking process has been completed,
ten acoustic signals are issued and the display
indicates 0:00. At the end of the program the
appliance automatically changes to a warming
mode for up to 60 minutes. In this mode, warm
air circulates inside the appliance. You can
prematurely terminate the warming function by
keeping the Start/Stop button pressed until two
acousitc signals are heard.
WARNING
Before opening the appliance lid, pull the power
plug out of the wall socket. When not in use, the
appliance should never be plugged in!
TAKING OUT THE BREAD
When taking out the baking mould, always use
pot holders or oven gloves. Hold the baking
mould tilted over a grid and shake lightly until the
bread slides out of the baking mould. If the bread
does not slip off the kneading paddles, carefully
remove the kneading paddles using the enclosed
kneading paddle remover.
Note
Do not use any metal objects that may lead
to scratches on the non-stick coating. After
removing the bread, immediately rinse the
baking mould with warm water. This prevents
the kneading paddles from sticking to the driving
shaft.
Tip: If you remove the kneading paddles after the
last kneading of the dough, the bread will remain
intact when you remove it from the baking mould.
• Briefl y press the Start/Stop button, to
interrupt the baking process or pull the power
plug out of the wall socket.
• Open the appliance lid and take out the
baking mould. You can take the dough out
with fl oured hands and remove the kneading
paddles.
• Replace the dough and close the appliance
lid.
• Push the plug back into the wall socket and
press the Start/Stop button. The baking
program is continued. Let the bread cool for
15-30 minutes before eating. Before cutting
bread, make sure that no kneading paddle is
still in the baking mould.
Warning
Do not attempt to start operating the bread
maker, before it has either cooled down or
warmed up. If the display shows “HHH” after
the program has been started, it means that
the temperature inside of bread pan is too high.
You should stop the program and unplugged
the power outlet immediately. Then open the
lid and let the machine cool down completely
before using again (except the program of BAKE
and JAM). If the display shows “LLL” after the
program has been started, it means that the
temperature inside of bread pan is too low.
You should place the bread maker on a higher
environment for using(except the program of
BAKE and JAM). If the display shows “EE0” after
you have pressed Start/Stop button, it means the
temperature sensor open circuit, please check
the sensor carefully by Authorized expert. If the
display shows “EE1”, it means the temperature
sensor short circuit.
CLEANING AND MAINTENANCE
Disconnect the machine from the power and let it
cool down prior to cleaning.
IMPORTANT
The parts and accessories of the appliance
should not be washed in a dish washing
machine.
1. bread pan: Rub inside and outside with
a damp cloth. Do not use any sharp or
abrasive agents for the consideration of
protecting the non-stick coating. The pan
must be dried completely prior to installing.
2. kneading blade: If the kneading bar is diffi cult
to remove from the axle, In such an event fi ll
the Container with warm water and allow it
to soak for approx. 30 minutes.The kneader
can then be easily removed for cleaning.
Also wipe the blade carefully with a cotton
damp cloth, Please note both the bread pan
and kneading blade are dishwashing safe
components.
3. lid and window: clean the lid inside and
outside with a slightly damp cloth.
4. Housing: gently wipe the outer surface of
housing with a wet cloth. Do not use any
abrasive cleaner to clean as this would
degrade the high polish of the surface. Never
immerse the housing into water for cleaning.
5. Before the bread maker is packed away for
storage, ensure that it has completely cooled
down, is clean and dry, and the lid is closed.
TECHNICAL DATA:
220-240V ~ 50Hz • 850W
ENGLISH
m-5152_v03.indd Abs1:4-Abs1:5m-5152_v03.indd Abs1:4-Abs1:5 2010.6.10 6:45:31 PM2010.6.10 6:45:31 PM


Alăturați-vă conversației despre acest produs
Aici puteți împărtăși ce părere aveți despre First Austria FA-5152 Mașina de pâine. Dacă aveți o întrebare, citiți mai întâi cu atenție manualul. Solicitarea unui manual se poate face folosind formularul nostru de contact.
răspuns | A fost util (21) (Tradus de Google)
răspuns | A fost util (5) Citeşte mai mult (Tradus de Google)
A fost util (0) (Tradus de Google)
răspuns | A fost util (2) (Tradus de Google)
răspuns | A fost util (2) (Tradus de Google)
răspuns | A fost util (0) (Tradus de Google)
răspuns | A fost util (0) (Tradus de Google)
răspuns | A fost util (0) (Tradus de Google)