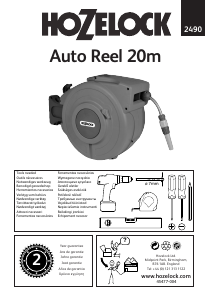
Manual Hozelock 2490 Auto Reel Tambur pentru furtun de grădina

Ai nevoie de un manual pentru Hozelock 2490 Auto Reel Tambur pentru furtun de grădina? Mai jos puteți vizualiza și descărca manualul PDF gratuit în limba română. Acest produs are în prezent 1 întrebare frecventă, 3 comentarii și are 12 voturi cu o evaluare medie a produsului de 33/100. Dacă acesta nu este manualul dorit, vă rugăm să ne contactați.

Produsul dvs. s-a defectat și manualul nu oferă nicio soluție? Mergeți la Repair Café pentru servicii de reparații gratuite.

Manual

Loading…

5
(Fig.1)
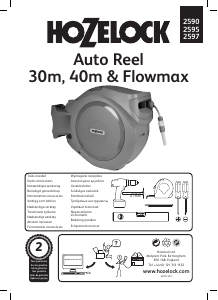
A. 93273 - Auto Reel
B. 83360 - Wall Bracket
C. 93411 - Feeder Hose
D. 2175 - Threaded tap connector
E. 2166 - Hose End Connector
F. 2185 - Waterstop Connector
G. 53025 x4 - Wall Plug
H. 53112 x4 - Screws
I. 2292 - Hose Nozzle
J. 83304 - Side Disc
TOOLS NEEDED:
• Flat-ended screwdriver
• Philips screwdriver
• Tape measure
• Ø7mm masonry drill bit
• Electric drill
• Spirit Level
FIT THE WATER INLET HOSE
Fig 1.
A. One side of the reel has its side disc already removed.
Lay the reel on a soft surface with this side uppermost.
B. Two screws hold in place the plate on the internal hose
connector. Unscrew them.
C. Pass the 2 metre water inlet hose through the opening
from the outside to the inside of the casing. Unscrew
the large hose nut connector and put it on the hose.
Push the hose under the teeth of the small clasp.
Tighten the hose nut. Screw the internal hose
connector back in place.
D. Fit the side disc. Attach the 2166 hose end connector
to the free end of the water inlet hose. Attach the
2185 water stop connector to the watering hose.
If the water inlet hose supplied is too short to reach
your tap, replace it with a good quality 13mm (1/2”)
hose.
SELECT A SUITABLE POSITION FOR
INSTALLATION
Fig. 2
The reel is designed for external use only and is not
suitable for use with indoor taps.
The reel should be able to swivel through 180º. Allow
50cm of clearance on both sides of the wall bracket.
If the hose is to be used around corners, mount the reel
at least 1m from the corner and use a hose guide, part
no. 2392, which is not supplied.
FIX THE WALL BRACKET
Fig 3.
Important: Ensure that the bracket is vertical.
Use the four plugs and screws supplied. The plugs and
screws supplied are designed for use on standard brick
and concrete or timber walls only. To fix the bracket to
any other surface, you should use screws and plugs
appropriate for that surface.
INSTALLING THE REEL
Fig 4.
1. Align the back of the reel with the wall bracket.
2. Slide the pivot tube through the reel and wall bracket
from the top.
3. Attach the threaded tap connector to your tap and
connect the water inlet hose to it.
4. Attach the 2292 nozzle onto the end of the watering
hose.
Test the assembly to ensure the reel rotates freely
through 180º. Turn the tap on and run the water
through the reel before using it for the first time. Check
for leaks and re-tighten assembled parts if leaks
appear.
A padlock (not supplied) may be fitted to secure the
reel when left unattended on the wall (fig 4A).
Fig 4B.
There is a park point on the top of the pivot tube for
stowage of the water inlet hose end when not in use.
There is an accessory park at the bottom of the bracket
for stowage of hose end accessories.
USING THE SAFETY LOCK
Fig 5.
Operate the safety lock by using the lever on the side of
the reel.
The safety lock has two functions:
1. To stop the hose being pulled out when fully re-wound.
2. To stop accidental rewind while the hose is in use.
To engage the safety lock, turn the lever towards the
symbol. To disengage it, turn the lever so that it
points towards the symbol.
For added security always engage the safety lock when
the reel is unattended.
Do not operate the safety lock while the reel is turning.
USING THE REEL SAFELY
1. To unwind the hose, disengage the safety lock, (see
above) take hold of the hose end and walk away from
the reel in any direction.
2. The reel has an automatic latch to hold the hose in
place at the required length. You will hear 4 latch
clicks’ every metre as the hose is unwound.
When the hose is at the required length, stop and
slowly pull the hose until you hear one of the 4 latch
clicks. The hose is now held in place for use, or may be
placed on the ground without rewinding. At this point,
you can engage the safety lock if required.
3. If you need more hose, disengage the safety lock if
necessary, take hold of the hose end and walk away
from the reel with the hose repeating the automatic
latching procedure.
4. The automatic latch is released by pulling the hose
away from the reel past the 4 latch clicks. THE HOSE
GB
Contents
Assembly and installation of
the Auto Reel
Warning
Descărcaţi manualul în limba română (PDF, 1.44 MB)
(Protejați mediul înconjurător și imprimați acest manual numai dacă este neapărată nevoie)

Loading…

Evaluare

Spuneți-ne ce părere aveți despre Hozelock 2490 Auto Reel Tambur pentru furtun de grădina, lăsând o evaluare a produsului. Doriți să împărtășiți experiența dvs. cu acest produs sau să adresați o întrebare? Lăsați un comentariu în partea de jos a paginii.
Ești mulțumit de Hozelock 2490 Auto Reel Tambur pentru furtun de grădina?
Da Nu
33%
67%
12 voturi

Alăturați-vă conversației despre acest produs

Aici puteți împărtăși ce părere aveți despre Hozelock 2490 Auto Reel Tambur pentru furtun de grădina. Dacă aveți o întrebare, citiți mai întâi cu atenție manualul. Solicitarea unui manual se poate face folosind formularul nostru de contact.

Amo 16-07-2019
Trebuie să știu cum să re-tensionați arcurile de înfășurare automată, în timp ce înlocuiam furtunul, furtunul a alunecat și tensiunea s-a dezvăluit și acum nu știu cum să strâng tensiunea înapoi. Poți să ajuți?

răspuns | A fost util (60) (Tradus de Google)
Dean Galley 13-07-2022
Cum înlocuiesc furtunul din caseta mea cu bobina automată Hozelock 2490?

răspuns | A fost util (15) (Tradus de Google)
Raymond Carr 31-05-2022
Derularea furtunului este în afara secvenței. M-am despărțit cele doua jumatati ale carcasei , cand furtunul este complet extins pozitia furtunului este in stanga in timp ce suportul scripetelui este in dreapta dand un vant neuniform . Trebuie să repoziționez suportul, este șurubul care se cuplează cu filetul șurubului de plastic detașabil, dacă da, îl pot scoate și pot glisa suportul în poziția corectă și reacupla șurubul sau există altă soluție. Mulțumiri

răspuns | A fost util (2) (Tradus de Google)

Mai multe despre acest manual

Înțelegem că este plăcut să aveți un manual pe hârtie pentru Hozelock 2490 Auto Reel Tambur pentru furtun de grădina. Puteți oricând descărca manualul de pe site-ul nostru web și îl puteți imprima singur. Dacă doriți să aveți un manual original, vă recomandăm să contactați Hozelock. S-ar putea să ofere un manual original. Căutați manualul dvs. Hozelock 2490 Auto Reel Tambur pentru furtun de grădina într-o altă limbă? Alegeți limba preferată pe pagina noastră de pornire și căutați numărul de model pentru a vedea dacă îl avem disponibil.

Specificații

Marcă Hozelock
Model 2490 Auto Reel
Categorie Tambure pentru furtun de grădină
Tip fișier PDF
Mărime fișier 1.44 MB

Toate manualele pentru Hozelock Tambure pentru furtun de grădină
Mai multe manuale pentru Tambure pentru furtun de grădină

Întrebări frecvente despre Hozelock 2490 Auto Reel Tambur pentru furtun de grădina

Echipa noastră de asistență caută informații utile despre produs și răspunde la întrebările frecvente. Dacă descoperiți o inexactitate în întrebările frecvente, vă rugăm să ne anunțați utilizând formularul de contact.

Pot lăsa mulineta furtunului de grădină afară în timpul iernii? Verificat

Nu, Hozelock vă sfătuiește să luați mulineta în interior în timpul iernii, cu excepția cazului în care este folosită efectiv. Frostul poate deteriora produsul.

A fost util (31) Citeşte mai mult
Manual Hozelock 2490 Auto Reel Tambur pentru furtun de grădina

Produse asemanatoare

Categorii relevante