
EN
HU
RO
PL
BG
EN
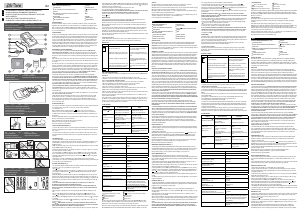
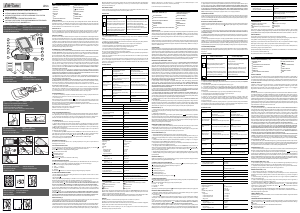
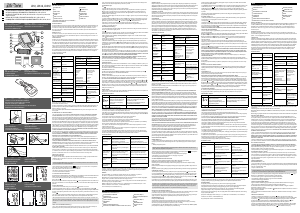
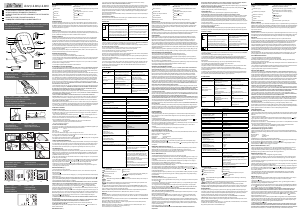
NAMES OF PARTS AND COMPONENTS (fi g.1)
8
LCD display.
1
ELECTRONIC UNIT.
9
M (MEMORY) BUTTON.
2
SOCKET FOR CONNECTION OF INFLATION BULB AND CUFF.
10
(POWER ON/OFF) BUTTON.
3
AIR HOSE.
11
CUFF.
4
TEE-CONNECTOR FOR CONNECTION OF INFLATION BULB AND CUFF
TO THE ELECTRONIC UNIT.
12
BAG.
5
INFLATION BULB.
13
BATTERIES.
6
INFLATION BULB BACK-PRESSURE VALVE.
14
WARRANTY CARD.
7
PRESSURE RELEASE VALVE.
15
OPERATION MANUAL.
GENERAL INFORMATION
This Instruction Manual is designed to assist the user with safe and eff ective operation of the semiautomatic
digital Device for measurement of blood pressure and heartbeat rate , model LD2 (hereafter: DEVICE). Use this
Device according to the rules described in this Manual. Operate the Device only as intended. Do not use the
Device for any other purposes. Read and understand the whole Instruction Manual, in particular “Recommenda-
tions on Correct Measurement”.
OPERATION PRINCIPLE
This Device uses the Fuzzy Algorithm oscillometric method of blood pressure and pulse rate measurement. Wrap
the cuff around your upper arm and it starts to be infl ated by infl ation bulb. The sensitive element of the Device
feels the weak pressure oscillations in the cuff generated by widening and contraction of the brachial artery in
response to every heartbeat (the amplitude of the pressure waves is measured, converted into millimeters Hg
and shown on the display as fi gures. The Device has 90 cells of memory for storage of measurement results.
Remember that the Device will not maintain the mentioned accuracy of a measurement if it is used or stored at
a temperature or humidity other than those specifi ed in Technical Specifi cations of this Manual. We warn you
about the possibility of mistakes in blood pressure measurement with this Device in persons with pronounced
cardiac arrhythmia. Consult the doctor concerning blood pressure measurement of your child.
RECOMMENDATIONS ON CORRECT MEASUREMENT
1. For correct measurement you should know that THE BLOOD PRESSURE IS SUBJECT TO SHARP VARIATIONS
EVEN WITHIN THE SHORT TIME INTERVALS. The blood pressure depends on many factors. It is usually lower in
summer and higher in winter. The blood pressure varies together with the atmospheric pressure, depends on
physical loads, emotional excitement, stresses and dietary regime. Drugs, drinking alcohol and smoking produce
signifi cant
Eff ect on blood pressure. Even the very procedure of blood pressure measurement in a hospital sends the blood
pressure high in many people, thus, the blood pressure measured at home often diff ers from the values received
in a hospital.
As the blood pressure tends to rise at low temperatures, make measurements at an indoor temperature (approxi-
mately 20 °C). If this Device was stored in the room with low temperature, keep it for at least 1 hour at an indoor
temperature before use, otherwise the measurement result may be incorrect. During the day, the diff erence in
readings for healthy people may be 30-50 mmHg of systolic pressure and to 10 mmHg of diastolic pressure. The
dependence of the blood pressure on various factors is individual for each person. Accordingly, it is recommended
to keep a special book with blood pressure measurement records. ONLY A CERTIFIED DOCTOR IS CAPABLE TO
ANALYZE THE TENDENCY OF YOUR BLOOD PRESSURE VARIATIONS USING YOUR RECORDS.
2. People with cardiovascular and some other diseases requiring blood pressure monitoring should make
measurements in the hours fi xed by attending doctor. REMEMBER THAT THE DIAGNOSTIC AND ANY TREATMENT
OF HYPERTENSION MAY BE CONDUCTED ONLY BY A CERTIFIED DOCTOR ON THE BASIS OF BLOOD PRESSURE VALUES
OBTAINED BY THIS DOCTOR. DRUGS PRESCRIPTION SHOULD BE CARRIED OUT ONLY BY YOUR ATTENDING DOCTOR.
3. At such disorders as deep vascular sclerosis, weak pulse wave and also in patients with the prominent distor-
tions of cardiac rhythm it may be diffi cult to measure the blood pressure accurately. IN SUCH CASES CONSULT A
CERTIFIED DOCTOR ABOUT APPLICATION OF THE ELECTRONIC DEVICE.
4. KEEP QUIET DURING A MEASUREMENT TO OBTAIN THE ACCURATE VALUES OF YOUR BLOOD PRESSURE WITH
THE ELECTRONIC DEVICE. Measure your blood pressure in the calm and comfortable conditions at the indoor
temperature. No eating an hour before measurement; no smoking, no taking tonic agents or alcohol 1.5-2 hours
before measurement.
5. The accuracy of blood pressure measurement depends on whether the cuff matches the size of your arm. THE
CUFF SHOULD NOT BE TOO SMALL OR TOO LARGE.
6. Wait 3 minutes between measurements for the blood to restore its circulation. However, the persons with
prominent atherosclerosis due to considerable loss of vascular elasticity may need to increase the wait time
between measurements (10-15 minutes). This also refers to the patients suff ering from diabetes. For more
accurate determination of blood pressure, it is recommended to make a series of 3 consecutive measurements
and to use the average value.
INSTALLING BATTERIES (fi g. 2)
1. Open the cover of the battery compartment and install 4 “AA” size batteries according to polarity marked inside
the compartment. Do not use much force to remove the cover of the battery compartment.
2. Close the battery cover.
Replace all batteries when the Low Battery Indicator “ ”, appears on the screen or when there is no
indication on the screen. The Low Battery Indicator does not show the discharge level. It is recommended to
use alkaline batteries. If the Device operation rules are observed, the batteries will last for approximately 1,000
measurements.
The batteries supplied with the Device are intended for check of the Device performance at sale and their service
life may be shorter than of the recommended batteries.
Replace all four batteries at the same time. Do not use the waste batteries.
If the Device is unused for a long time, remove all batteries.
Do not leave the waste batteries in the Device.
CORRECT POSE DURING MEASUREMENT (fi g. 3)
1. Sit near a table so that your arm rests on its surface during measurement. Make sure that the point of the cuff
application is approximately at the same height as your heart, and that your forearm lies freely on the table and
does not move.
2. You can measure pressure when lying on your back. Look at the ceiling, keep calm and do not move during
measurement. Make sure that the measurement point on your upper arm is approximately at the same level as
your heart.
CUFF PREPARATION (fi g. 4)
1. Insert the cuff end for about 5 cm into a metal ring as shown in fi gure.
2. Apply the cuff to your left upper arm so that the air tube is directed to your palm. If the measurement on your
left arm is diffi cult, you may use your right arm. In this case remember that the readings may diff er by 5-10
mmHg and even more.
3. Wrap the cuff around your upper arm so that the bottom of the cuff is approximately 2-3 cm above your elbow.
The sign “ARTERY” should be over the arm artery.
4. Fix the cuff so that it fi ts tightly to the arm, but make sure that it is not overtight. Too tight or too loosen place-
ment of the cuff may give inaccurate readings.
5. On the fi xed cuff the sign «INDEX» should point to the area «NORMAL (25-36 cm)».It means that the cuff is
chosen correctly and fi ts the size of your upper arm. if the sign points to the area marked « » the cuff is too
small and the readings will be higher. If the sign points to the area marked « » the cuff is too large and the
readings will be lower.
6. If the arm has a conic form, the cuff should be put on with a spiral movement as shown in the fi gure.
7. If the rolled-up sleeve squeezes the arm interfering with free blood fl ow the Device may give inaccurate fi gures
not corresponding to your actual blood pressure.
PROCEDURE OF MEASUREMENT (fi g. 5)
1. Insert the Air Tube Plug into the Cuff Jack. Make 3-5 deep inhales and exhales before taking a measurement
and relax. Do not move, do not speak and do not toughen your arm.
2. Press button.
3. The display will show all symbols for a short time (Fig. 2), you will hear two short acoustic signals. After the
acoustic signal, “0” is displayed, and the “ “ marker starts blinking. This means that the Device is ready for
measurement (Fig. 3).
4. Pump the cuff by pressing the infl ation bulb to the pressure 30-40 mmHg higher than your expected systolic
(upper) pressure. The value of the pressure in the cuff is constantly displayed in the Device screen. If the sum of
the expected systolic (upper) pressure plus 30-40 mmHg is lower or equals to 190 mmHg, you can pump the cuff
until you hear an acoustic sound for convenience (the Device emits an acoustic sound if the pressure in the cuff
is 190 mmHg).
IF THIS SUM IS HIGHER THAN 190 MM HG, KEEP PUMPING THE CUFF AFTER THE ACOUSTIC SIGNAL TO THE
REQUIRED PRESSURE, WHILE OBSERVING THE READINGS IN THE DISPLAY.
DO NOT PUMP THE PRESSURE IN THE CUFF OVER 300 MM HG, AS THIS WILL EXCEED THE MAXIMUM MEASURE-
MENT LIMIT OF THE DEVICE. UPON REACHING THE PRESSURE OF 300 MM HG, YOU WILL HEAR AN INTERMITTENT
ACOUSTIC SIGNAL.
5. After reaching the required pressure in the cuff , stop pressing the infl ation bulb and carefully put it on the
table.
6. Pressure in the cuff will start decreasing automatically, and you will see the “
“ marker in the screen.
7. If the “
“ appears during pressure release, the cuff was not pumped to the required level. For 4 seconds,
pump the cuff for 30-40 mmHg higher than the previous value. Otherwise, the error message “ ” will appear
on the display.
8. Pressure measurement is done while the “ “ symbol blinks. Try to stay immobile and not to move your arm
during measurement.
IF THE “ “ MARKER APPEARS ON THE DISPLAY, STOP THE MEASUREMENT AND COMPLETELY RELEASE THE
PRESSURE IN THE CUFF BY PRESSING THE PRESSURE RELEASE VALVE. TAKE THE CUFF OFF AND LET YOUR ARM REST.
REPEAT THE MEASUREMENT WITH FULL ABIDANCE OF THIS OPERATION MANUAL.
9. When the measurement ends, you will hear a continuous signal, and readings of your pressure and pulse will
LD2
PL
INSTRUCTION MANUAL FOR DIGITAL BLOOD PRESSURE MONITOR LD2
BGINSTRUKCJA OBSŁUGI CIŚNIENIOMIERZA CYFROWEGO
LD2
CZHASZNÁLATI ÚTMUTATÓ.
LD2
KÉSZÜLÉK A VÉRNYOMÁS ÉS PULZUSSZÁM
DIGITÁLIS MÉRÉSÉRE
HUMANUAL DE UTILIZARE A TENSIOMETRULUI DIGITAL
LD2
ROРЪКОВОДСТВО ЗА ЕКСПЛОАТАЦИЯ НА ЦИФРОВ ТОНОМЕТЪР
LD2
fi g.1 rys. 1 1 . ábra desenul 1 рис. 1
PARTS AND COMPONENTS DENUMIREA PĂRŢILOR ȘI COMPONENTELOR
PODSTAWOWE CZĘŚCI I KOMPONENTY НАЗВАНИЯ НА ЧАСТИ И КОМПОНЕНТИ
ALKATRÉSZEK MEGNEVEZÉSE
fi g.2 rys. 2 2 . ábra desenul 2 рис. 2
BATTERY INSTALLATION INSTALAREA BATERIILOR
WYMIANA BATERII
ПОСТАВЯНЕ НА ЕЛЕМЕНТИТЕ НА ЗАХРАНВАНЕ
AZ ELEMEK BEHELYEZÉSE
fi g.3 rys. 3 3. ábra desenul 3 рис. 3
CORRECT POSITION DURING MEASUREMENT
PRZYJĘCIE POZYCJI UMOŻLIWIAJĄCEJ POMIAR
A HELYES TESTHELYZET A MÉRÉSNÉL
POZIŢIA CORECTĂ ÎN TIMPUL PROCESULUI DE MĂSURARE
ПРАВИЛНА ПОЗА ПРИ ИЗМЕРВАНЕ
fi g.4 rys. 4 4 . ábra desenul 4 рис. 4
CUFF PREPARATION PREGĂTIREA MANȘETEI
ZAKŁADANIE MANKIETU ПОДГОТОВКА НА МАНШЕТА
A MANDZSETTA ELŐKÉSZÍTÉSE
fi g.5 rys. 5 5 . ábra desenul 5 рис. 5
MEASUREMENT PROCEDURE ORDINEA MĂSURĂRII
PROCEDURA POMIARU НАЧИН НА ИЗМЕРВАНЕ
A MÉRÉS MÓDSZERE
appear in the display (Fig. 4). Blinking “ ” symbol in the display indicates irregular pulse rhythm. Appearance
of the arrhythmia indicator may also be caused by movement during measurement. If the “
” symbol appears
periodically, contact your consulting physician.
10. Release the residual pressure in the cuff by using the pressure release valve.
11. For repeated measurement, simply start pumping the cuff again.
TO OBTAIN AN ACCURATE RESULT, YOU NEED A BREAK BETWEEN MEASUREMENTS TO RESTORE BLOOD CIRCULATION.
FOR THIS REASON, DO NOT PERFORM REPEATED MEASUREMENT SOONER THAN IN 3 MINUTES.
If power is not off and the Device is not used for 3 minutes, it will switch off automatically.
12. Press button.
MEMORY FUNCTION
1. The result of each measurement (pressure and pulse) is automatically recorded into the Device memory.
MEASUREMENT RESULT WILL NOT BE SAVED, IF THERE WAS AN ERROR MESSAGE.
2. The Device memory can store up to 90 measurement results and the average value of 3 last measurements.
When the number of measurements exceeds 90, the oldest data will be automatically replaced with the new
measurement data.
3. You can view the contents of the Device memory by pressing the M button. When you press the M button for
the fi rst time, you will see the average value of three last readings stored in the Device memory with the “А”
index. When you press the M button again, you will see the “1” index (number of memory cell) for a short time,
after which the result of the last measurement will appear (Fig. 5).
Each consecutive pressing of the M button will increase the cell number index with further display of the contents
of the indicated memory cell.
CLEARING THE DEVICE MEMORY
To delete all measurement results saved in the Device, press the M button and hold it for over 5 seconds. “Clr”
symbols will be displayed in the screen and clearing of the entire Device memory will take place.
ERROR MESSAGES
INDICATION POSSIBLE CAUSE SOLUTION
REMEDY
The cuff is put on incorrectly or the air tube tee
connector is inserted loosely.
Measurements could not be done because of the
arm movement or talking during measurement.
The cuff was not pumped to the required level.
In case of apparent heart rhythm disorders, deep
vascular sclerosis, weak pulse wave, correct mea-
surement of blood pressure may be hindered.
Make sure the cuff is put on correctly, and
the tee is inserted tightly, and repeat the
measurement procedure.
Repeat the measurement with full observa-
tion of the recommendations of this operation
manual.
Repeat the measurement, pumping the
cuff 30-40 mmHg higher than the expected
systolic pressure.
In these cases, you should consult a certifi ed
physician about the use of the electronic
Device.
Batteries are discharged Replace all batteries with new ones
CARE, STORAGE, REPAIR AND DISPOSAL
1. This Device should be protected from increased humidity, direct sunrays, impact, vibration. THE DEVICE IS NOT
WATER-PROOF!
2. Do not store and do not use the Device in close proximity to heating Devices and open fi re.
3. If the Device is not used for a long time, remove the batteries from the Device. Battery leakage may damage
the Device. KEEP THE BATTERIES AWAY FROM CHILDREN!
4. Do not contaminate the Device and protect it from dust. You can use soft dry cloth to clean the Device.
5. Avoid contact of the Device or its parts with water, solvents, alcohol. Do not use petroleum.
6. Protect the cuff from sharp object, and do not try stretching or twisting the cuff .
7. Do not expose the Device to strong impacts and do not drop it.
8. The Device does not have any measurement accuracy controls. Individual disclosure of the electronic unit is
prohibited. If necessary, the repair shall be performed only in specialized organizations.
9. After the end of the established service life you should periodically contact experts (specialized repair organiza-
tions) to check the technical condition of the Device.
10. Disposal is governed by the rules in eff ect in your region. The manufacturer does not establish any special
disposal conditions for this Device.
11. The cuff is resistant to repeated sanitary treatment. It is allowed to treat the inner side of the cloth surface of
the cuff (the one contacting with the patient’s arm) with a cotton wool pad damped in 3 % hydrogen peroxide
solution. In case of continuous use, partial decoloring of the cloth surface of the cuff is admissible. Wet wash of
the cuff , as well as its treatment with a hot iron, is not allowed.
POSSIBLE PROBLEMS
PROBLEM POSSIBLE CAUSE SOLUTION REMEDY
No image on display after
pressing the button
Batteries are discharged.
Polarity of batteries is not observed.
Battery contacts are contaminated.
Replace all batteries with new ones.
Install the batteries correctly.
Wipe the contacts with a dry cloth.
Blood pressure is diff erent
every time.
Measurement values are too
low (too high).
Is the cuff located at the heart level?
Was the cuff put on correctly?
Is your hand relaxed?
Maybe you were talking or moving your
hand during measurement.
Take the correct pose for measurement.
Put the cuff on correctly.
Relax before measurement.
Keep quiet and calm during measure-
ment.
Pulse rate value is too high
(too low).
Maybe you were talking or moving your
hand during measurement.
Were the measurements done after a
physical load?
Keep quiet and calm during measure-
ment.
Repeat measurement after at least 5
minutes.
Independent switching off . Automatic switch off system activates. This is not a failure. The Device switches
off automatically 3 minutes after the
last measurement.
TECHNICAL SPECIFICATIONS
Method of measurement
oscillometric with Fuzzy Algorithm technology
Indicator LCD, three-line
Pressure indication range in the cuff , mmHg 0 to 300
Measurement range:
pressure in cuff , mmHg
pulse rate, 1/min
40 to 260
40 to 160
Measurement error:
pressure in cuff , mmHg
pulse rate, %
±3
±5
Power voltage, V 6
Power supply type: 4 AA batteries (LR6)
Max. power consumption, W 0,09
Memory Last 90 measurements + average value of last three
measurements
Operation conditions:
temperature, °C
crelative humidity, % Rh
10 to 40
85 and lower
Storage and handling conditions:
temperature, °C
relative humidity, % Rh
minus 20 to 50
85 and lower
Cuff size: extended adult (upper arm circumference 25-36 cm)
Dimensions:
Size (digital unit), mm
Weight (without packaging, bag and batteries), g
121 x 84 x 64
303
Package contents digital unit, Cuff -LDA (assembly with tubes and tee),
LD-S035 infl ation bulb assembly (with pressure
release valve and back-pressure valve), 4 batteries,
bag, operation manual, warranty card, package.
Year of manufacture The year and month of manufacture are indicated on
the bottom part of the housing in the serial number
after the “A” symbol
SYMBOL EXPLANATION:
Compliance with the Directive 93/42/EEC
Important: Read the instruction
Representative in the EU
Manufacturer
Ukraine conformance mark
Approval of means of measurement types of Ukraine
Keep from moisture
Protection class II
BF type product
The revision date of this Operation manual is indicated at the last page in the EXXX/YYMM/NN format, where
YY is the year, ММ is the month, and NN is the revision number. Technical specifi cations are subject to change
without prior notice in order to improve operational properties and quality of the product.
Production is certifi ed according to the international standard ISO 13485. The LD2 Device complies with the European
Directive MDD 93/42/ЕЕС, international standards EN980, EN1041, EN1060-1, EN1060-3, EN10601-1-2, ISO 14971.
WARRANTY
The warranty liabilities are contained in the warranty card given at the sale of this Device to a purchaser.
The addresses of organizations for warranty maintenance are given in the warranty card.
Manufactured under control and for Little Doctor International (S) Pte. Ltd. (35 Selegie Road #09-02 Parklane Shopping
Mall, Singapore 188307, postal address: Yishun Central P.O. Box 9293 Singapore 917699).
Manufacturer: Little Doctor Electronic (Nantong) Co. Ltd. (No. 8, Tongxing Road Economic & Technical Development
Area, 226010 Nantong, Jiangsu, People’s Republic of China).
Distributor in European Union: Little Doctor Europe Sp. z o. o. (57G Zawila Street, 30-390 Kraków, Poland, phone: +48
12 2684746, 12 2684747, fax: +48 12 268 47 53, e-mail: biuro@littledoctor.pl)
For more information please visit www.littledoctor.sg
PL
NAZWA CZĘŚCI I ELEMENTÓW (rys.1)
8
WYŚWIETLACZ LCD.
1
MODUŁ ELEKTRONICZNY.
9
PRZYCISK M (PAMIĘĆ)
2
GNIAZDO DO PODŁĄCZENIA GRUSZKI I MANKIETU.
10
PRZYCISK (WŁĄCZANIE/WYŁĄCZANIE ZASILANIA).
3
WĄŻ POWIETRZA.
11
MANKIET.
4
TRÓJNIK DO PODŁĄCZENIA GRUSZKI I MANKIETU DO
BLOKU ELEKTRONICZNEGO.
12
TORBA.
5
GRUSZKA INFLACYJNA (POMPKA).
13
ELEMENTY ZASILANIA.
6
ZAWÓR ZWROTNY POMPKI.
14
KARTA GWARANCYJNA.
7
ZAWÓR SPUSTOWY CIŚNIENIA.
15
INSTRUKCJA OBSŁUGI.
INFORMACJE OGÓLNE
Niniejsza instrukcja służy dla użytkownika pomocą w bezpiecznym i efektywnym obsługiwaniu przyrządu
cyfrowego LD do pomiaru ciśnienia tętniczego krwi oraz częstotliwości pulsu, model LD2 (dalej w tekście:
URZĄDZENIE.) Urządzenie powinno być stosowane zgodnie z zasadami przedstawionymi w niniejszej instrukcji i
nie należy go stosować do innych celów. Ważne jest, aby przeczytać i zrozumieć całą instrukcję obsługi, zwłaszcza
rozdział “Zalecenia dotyczące prawidłowego pomiaru”.
WSKAZANIA DO STOSOWANIA
Do pomiaru ciśnienia tętniczego krwi i tętna urządzenie wykorzystuje metodę oscylometryczną Fuzzy Algorithm.
Owinięty wokół ramienia mankiet pompowany jest przy pomocy pompki-gruszki. Czujnik urządzenia wykrywa
delikatne wahania ciśnienia w mankiecie, powstające wskutek rozszerzania się i kurczenia tętnicy ramiennej
jako odpowiedź na każde uderzenie serca. Amplituda fal ciśnienia jest mierzona, przeliczana na milimetry słupa
rtęci i wyświetlana jako wartość cyfrowa. Urządzenie posiada pamięć 90 komórek do przechowywania wyników
pomiarów. Należy zwrócić uwagę na to, że urządzenie może nie zapewniać określonej dokładności pomiaru, w
przypadku gdy jest ono używane lub przechowywane w temperaturze lub wilgotności innej, niż podane w sekcji
“Dane Techniczne” niniejszej instrukcji. Ostrzegamy o możliwych błędach podczas pomiaru ciśnienia tętniczego
krwi u osób z rozrusznikami serca. Przed pomiarem ciśnienia tętniczego krwi u dzieci trzeba skonsultować się z
lekarzem.
ZALECENIA DOTYCZĄCE PRAWIDŁOWEGO POMIARU
1. Dla przeprowadzenia prawidłowego pomiaru należy pamiętać, że CIŚNIENIE TĘTNICZE PODLEGA SILNYM WA-
HANIOM NAWET W KRÓTKIM OKRESIE CZASU. Poziom ciśnienia krwi zależy od wielu czynników. Zwykle jest ono
niższe latem i wyższe zimą. Ciśnienie krwi zmienia się wraz z ciśnieniem atmosferycznym, zależy od wysiłku fi zy-
cznego, emocjonalnej pobudliwości, stresu, diety. Duży wpływ mają używki, narkotyki, alkohol i palenie tytoniu.
U wielu osόb nawet procedura pomiaru ciśnienia w przychodni powoduje wzrost wskaźników. Dlatego ciśnienie
tętnicze zmierzone w warunkach domowych może różnić się od ciśnienia mierzonego w klinice. W związku z tym,
że ciśnienie krwi wzrasta w niskich temperaturach, przeprowadzać jego pomiar trzeba w temperaturze pokojowej
(około 20 °C). Jeżeli urządzenie było przechowywane w niskiej temperaturze, zaleca się pozostawić go w temper-
aturze pokojowej przez co najmniej 1 godzinę. Po tym czasie można korzystać z tego urządzenia. W przeciwnym
wypadku wynik pomiaru ciśnienia może być błędny. W ciągu doby różnica we wskazaniach zdrowych ludzi może
wynosić 30-50 mmHg. ciśnienia skurczowego (górnego) i do 10 mmHg. ciśnienia rozkurczowego (dolnego). U
każdego człowieka ciśnienie zależy od różnych czynników. Dlatego zaleca się prowadzenie dziennika pomiarów
ciśnienia tętniczego krwi. TYLKO DYPLOMOWANY LEKARZ NA PODSTAWIE TAKICH DANYCH MOŻE ANALIZOWAĆ
TENDENCJE ZMIAN CIŚNIENIA TĘTNICZEGO.
2. Przy chorobach sercowo-naczyniowych i w przypadku wielu innych chorób, które wymagają monitorowania
ciśnienia tętniczego, pomiary należy wykonywać w porach, wskazanych przez lekarza. PAMIĘTAJ, ŻE DIAGNOS-
TYKA I JAKIEKOLWIEK LECZENIE NADCIŚNIENIA TĘTNICZEGO MOŻE BYĆ WYKONYWANE TYLKO PRZEZ LEKARZA NA
PODSTAWIE JEGO WŁASNORĘCZNĘGO ODCZYTU POMIARÓW CIŚNIENIA KRWI. PRZYJMOWANIE LUB ZMIANĘ DAWEK
LEKÓW NALEŻY PRZEPROWADZAĆ TYLKO WEDŁUG ZALECEŃ LEKARZA.
3. Pomiar ciśnienia tętniczego może być utrudniony przy takich zaburzeniach jak: miażdżyca naczyń
krwionośnych, słaba fala pulsu, a także u pacjentów z poważnymi zaburzeniami rytmu serca,. W TYCH PRZY-
PADKACH NALEŻY SKONSULTOWAĆ SIĘ Z DYPLOMOWANYM LEKARZEM ODNOŚNIE STOSOWANIA URZĄDZENIA
ELEKTRONICZNEGO.
4. W TRAKCIE POMIARU PRZY KORZYSTANIU Z ELEKTRONICZNEGO URZĄDZENIA DLA UZYSKANIA PRAWIDŁOWEGO
ODCZYTU CIŚNIENIA TĘTNICZEGO NALEŻY ZACHOWAĆ CISZĘ . Pomiar ciśnienia tętniczego powinien być przeprow-
adzony w spokojnej atmosferze przy temperaturze pokojowej. Godzinę przed wykonaniem pomiaru ciśnienia
należy unikać jedzenia, picia 1,5-2 godziny palenia papierosów, spożywania napojów tonizujących lub alkoholu.
5. Dokładność pomiaru zależy od dopasowania mankietu urządzenia do wielkości ręki. MANKIET NIE POWINIEN
BYĆ ZBYT MAŁY LUB ZBYT DUŻY.
6. W celu przywrócenia prawidłowego ciśnienia krwi, ponowne pomiary winny być wykonywane w odstępach
3 minut. Jednak dla osόb cierpiących na miażdżycę, z powodu dużej utraty elastyczności naczyń krwionośnych,
między pomiarami wymagany jest większy odstęp czasu (10-15 minut). Dotyczy to również pacjentów z
cukrzycą. Aby dokładniej określić ciśnienie krwi, zaleca się wykonać serię 3 kolejnych pomiarów i wykorzystać
średnią wartość wyników pomiaru.
INSTALACJA BATERII (rys. 2)
1. Otwórz pokrywę komory baterii i włóż 4 baterie AA, jak pokazano na schemacie, który znajduje się wewnątrz
tej komory. Upewnij się, że polaryzacja jest przestrzegana. Podczas otwierania pokrywy komory baterii prosimy
nie stosować nadmiernej siły.
2. Zamknij pokrywę komory baterii.
W przypadku gdy na wyświetlaczu ciągle jest widoczny symbol wymiany baterii “
” lub na nim nic się nie
wyświetla należy wymienić wszystkie elementy zasilania. Wskaźnik wymiany baterii nie pokazuje stopnia
rozładowania. Zaleca się stosowanie baterii alkalicznych. Przy zachowaniu zasad obsługi urządzenia baterie
wytrzymują około 1000 pomiarów.
Przy wymianie baterii należy wymienić je wszystkie jednocześnie. Nie należy korzystać z baterii, które były w
użyciu. Jeśli urządzenie nie jest używane przez dłuższy czas, należy wyjąć z niego baterie.
Nie należy zostawiać zużytych baterii w urządzeniu.
PRAWIDŁOWA POSTAWA PODCZAS POMIARU (rys. 3)
1. Usiądź tak, aby podczas pomiaru ciśnienia krwi Twoja ręka leżała na powierzchni stołu. Upewnij się, że miejsce
założenia mankietu znajduje się na tej samej wysokości co serce, że przedramię swobodnie leży na stole i nie rusza się.
2. Można mierzyć ciśnienie i w pozycji leżącej na plecach. Patrząc na sufi t, zachowaj spokój i nie ruszaj się w
trakcie pomiaru. Upewnij się, że miejsce pomiaru na ramieniu znajduje się na poziomie serca.
PRZYGOTOWANIE MANKIETU (rys. 4)
1. Wsuń krawędź mankietu w metalowy pierścień na około 5 cm, jak pokazano na rysunku.
2. Załóż mankiet na lewą rękę, rurka powinna być skierowana w stronę dłoni. W przypadku gdy pomiar na lewej
ręce jest utrudniony, można przeprowadzić pomiar na prawej ręce. W tym przypadku należy pamiętać, że wyniki
mogą się różnić o 5-10 mmHg.
3. Owinąć mankiet wokół ramienia tak, aby dolna krawędź mankietu znajdowała się w odległości 2-3 cm od
zgięcia łokciowego. Etykieta z napisem “ARTERY” powinny znajdować się nad tętnicą.
4. Zapiąć mankiet tak, aby ciasno przylegał do ramienia, ale go nie ściskał. Zbyt ciasne lub odwrotnie, zbyt luźne
umieszczenie mankietu może prowadzić do niedokładnych odczytów.
5. Na zapiętym mankiecie znaczek “INDEX” powinien wskazywać na obszar “NORMALNY (25-36 cm)”. Oznacza to,
że mankiet jest dopasowany prawidłowo i odpowiada rozmiarowi obwodu ramienia. Jeżeli strzałka wskazuje na
obszar “ ”, oznacza to, że mankiet jest za mały i wyniki będą zawyżone. Jeżeli strzałka wskazuje na obszar “
” oznacza to, że mankiet jest za duży i wyniki będą zaniżone.
6. W przypadku, gdy ręka ma wyrażoną stożkowatość, zaleca się spiralne zakładanie mankietu, jak pokazano na
rysunku.
7. Podwinięte rękawy nie mogą uciskać ramienia, gdyż może to zmniejszyć przepływ krwi, a odczyty urządzenia
mogą być nieprawidłowe.
PROCEDURA POMIARU (rys. 5)
1. Podłącz przewody mankietu oraz pompki do trójnika. Podłącz trójnik do gniazda na obudowie przyrządu (rys.
1). Bezpośrednio przed wykonaniem pomiaru należy wykonać 3-5 głębokich oddechów i rozluźnić się. W trakcie
pomiaru nie ruszać się, nie rozmawiać i nie napinać mięśni.
2. Kliknij na przycisk
.
3. Na moment wyświetlą się wszystkie symbole (rys. 2) i rozlegną się dwa krótkie sygnały dźwiękowe. Po
usłyszeniu sygnału, na ekranie pojawi się “0” i zacznie migać wskaźnik “
“. To oznacza, że przyrząd jest gotowy
do pomiaru (rys. 3).
4. Dopompuj mankiet, za pomocą gruszki aż ciśnienie będzie większe od waszego oczekiwanego ciśnienia
skurczowego (górnego) na 30-40 mmHg.
Wartość ciśnienia w mankiecie cały czas wyświetla się na ekranie urządzenia. Jeżeli suma oczekiwanego ciśnienia
skurczowego (górnego) plus 30-40 mmHg jest mniejsza lub równa 190 mmHg, można, dla wygody, pompować
mankiet do sygnału dźwiękowego (urządzenie wyemituje sygnał dźwiękowy przy ciśnieniu w mankiecie 190
mmHg).
JEŚLI SUMA TA PRZEWYŻSZA 190MM HG, NALEŻY KONTYNUOWAĆ POMPOWANIE MANKIETU DO ODPOWIEDNIEGO
POZIOMU, ŚLEDZĄC WSKAZANIA NA WYŚWIETLACZU. NIE PRZEKRACZAĆ POZIOMU 300 MM HG, KTÓRY JEST
MAKSYMALNYM ZAKRESEM POMIAROWYM URZĄDZENIA. O PRZEKROCZENIU POZIOMU 300 MM HG INFORMUJE
PRZERYWANY SYGNAŁ DŹWIĘKOWY.
5. Po osiągnięciu wymaganego ciśnienia w mankiecie, zakończ pompowanie.
6. Ciśnienie w mankiecie automatycznie zacznie się zmniejszać, a na ekranie pojawi się wskaźnik “
“.
7. Jeśli podczas zrzutu ciśnienia pojawił się symbol “
“, oznacza to, że mankiet nie był napompowany do
wymaganego poziomu. W ciągu 4 sekund napompuj mankiet na 30-40 mmHg powyżej poprzedniej wartości, w
przeciwnym razie na wyświetlaczu pojawi się komunikat o błędzie “
“.
8. Pomiar ciśnienia trwa cały czas, jeśli miga symbol “ “. Postaraj się pozostać nieruchomo i nie poruszać ręką
podczas pomiaru.
W PRZYPADKU POJAWIENIA SIĘ SYMBOLU “
” WSTRZYMAJ POMIAR I SPUŚĆ CAŁKOWICIE CIŚNIENIE Z
MANKIETU, ODKRĘCAJĄC ZAWÓR SPUSTOWY. ZDEJMIJ MANKIET, DAJ ODPOCZĄĆ RĘCE I WRÓĆ DO WYKONYWANIA
POMIARU ZGODNIE Z NINIEJSZĄ INSTRUKCJĄ.
9. Pod koniec pomiaru rozlegnie się długi sygnał dźwiękowy, a na ekranie pojawią się wskaźniki ciśnienia i pulsu
(rys. 4). Migająca ikonka “
”, która pojawi się na wyświetlaczu informuje o nieregularnym rytmie serca.
Pojawienie się wskaźnika arytmii może być spowodowane ruchem ciała podczas pomiaru. W przypadku gdy “
” pojawia się co jakiś czas należy skontaktować się z lekarzem.
10. Usuń pozostałe ciśnienie z mankietu za pomocą zaworu spustowego.
11. W celu ponownego pomiaru po prostu zacznij pompować mankiet.
W CELU UZYSKANIA DOKŁADNEGO WYNIKU NIEZBĘDNE SĄ PRZERWY MIĘDZY POMIARAMI DLA PRZYWRÓCENIA
KRĄŻENIA KRWI. DLATEGO NIE NALEŻY PRZEPROWADZAĆ PONOWNEGO POMIARU WCZEŚNIEJ, NIŻ CO 3 MINUTY.
Jeśli zasilanie jest wyłączone i urządzenie nie jest używane w ciągu 3 minut, wyłączy się ono automatycznie.
12. Kliknij na przycisk
.
FUNKCJA PAMIĘCI
3. Wyświetlić zawartość pamięci urządzenia można, naciskając przycisk M. Po pierwszym naciśnięciu przycisku
M na ekranie pojawi się wartość średnia z trzech ostatnich pomiarów zapisanych w pamięci urządzenia z oznac-
zeniem “A”. Po ponownym naciśnięciu przycisku M na ekranie na krótko pojawi się wskaźnik “1” (numer komórki
pamięci), po czym pojawi się wynik ostatniego pomiaru (rys. 5).
Przy każdym kolejnym naciśnięciu na przycisk M, indeks numeru komórki pamięci wzrośnie o jednostkę a
następnie wyświetli się na ekranie zawartość danej komórki pamięci.
CZYSZCZENIE PAMIĘCI URZĄDZENIA
Aby usunąć z pamięci urządzenia wszystkie zapisane w niej wyniki pomiarów, należy nacisnąć przycisk M i
przytrzymać go przez ponad 5 sekund. Na wyświetlaczu pojawi się symbol “Clr” i nastąpi oczyszczenie całej
pamięci urządzenia.
KOMUNIKATY O BŁĘDACH
SYMBOL PRAWDOPODOBNA PRZYCZYNA
SPOSOBY ROZWIĄZYWANIA
Źle założony mankiet lub trójnik węża powietrza
jest luźno wstawiony.
Pomiary nie mogły być wykonane ze względu na
ruchy ręką lub rozmowy w trakcie pomiaru.
Mankiet nie był napompowany do prawidłowego
ciśnienia.
Przy wyraźnych zaburzeniach rytmu serca,
zaawansowanej miażdżycy naczyń, słabej fali
pulsu pomiar ciśnienia tętniczego może być
utrudniony.
Upewnij się, że mankiet został prawidłowo
założony, a trójnik jest ciasno włożony i
powtórz całą procedurę pomiarów.
Powtórz pomiar, stosując się do wskazówek
zawartych w instrukcji obsługi.
Powtórz pomiar, pompując mankiet na 30-40
mmHg powyżej oczekiwanego ciśnienia
skurczowego.
W tych przypadkach należy skonsultować
się z dyplomowanym lekarzem odnośnie
stosowania urządzenia elektronicznego.
Rozładowane baterie Wymień wszystkie baterie na nowe
KONSERWACJA, PRZECHOWYWANIE, NAPRAWA I UTYLIZACJA
1. Urządzenie należy chronić przed wilgocią, bezpośrednim światłem słonecznym, wstrząsami i wibracjami.
URZĄDZENIE NIE JEST WODOODPORNE!
2. Nie przechowuj i nie używaj urządzenia w pobliżu grzejników i otwartego ognia.
3. Jeśli urządzenie przez dłuższy czas nie jest używane, należy wyjąć z niego baterie. Wyciek elektrolitu z baterii
może spowodować uszkodzenie urządzenia. BATERIE NALEŻY PRZECHOWYWAĆ W MIEJSCU NIEDOSTĘPNYM DLA
DZIECI!
4. Nie zanieczyszczać urządzenia i chronic go przed kurzem. Do czyszczenia urządzenia można używać wyłącznie
suchej, miękkiej szmatki.
5. Nie dopuszczać do kontaktu urządzenia i jego części z wodą, rozpuszczalnikami, alkoholem, benzyną.
6. Chroń mankiet przed ostrymi przedmiotami i nie próbuj go ciągnąć ani przekręcać.
7. Nie narażaj urządzenia na silne wstrząsy i nie rzucaj nim.
8. Urządzenie nie zawiera elementów ustawienia dokładności pomiaru. Zabrania się samoczynie otwierać blok
elektroniczny. W razie potrzeby należy wykonać naprawę tylko w wyspecjalizowanych punktach serwisowych.
9. Utylizacji należy dokonywać zgodnie z lokalnie obowiązującymi przepisami. Specjalne warunki utylizacji nie
zostały ustalone przez producenta.
10. Mankiet jest odporny na wielokrotną sanityzację. Dopuszcza się czyszczenie wewnętrznej strony powłoki
mankietu (która ma kontakt z ręką pacjenta) wacikiem nasączonym 3 % roztworem nadtlenku wodoru.
Długotrwałe stosowanie może spowodować częściowe odbarwienia mankietu. Nie wolno go prać oraz prasować.
MOŻLIWE PROBLEMY
PROBLEM MOŻLIWA PRZYCZYNA ROZWIĄZANIE
Po naciśnięciu przycisku
brak obrazu na wyświetlaczu
Rozładowane baterie.
Nie została zachowana prawidłowa
polaryzacja baterii.
Styki baterii są zabrudzone.
Wymień wszystkie baterie na nowe.
Włóż baterie prawidłowo.
Przetrzyj styki suchą ściereczką.
Ciśnienie krwi za każdym
razem jest inne.
Wartości pomiarów są za
niskie (wysokie).
Czy mankiet znajduje się na poziomie
serca?
Czy mankiet został prawidłowo
założony?
Czy ręka nie jest napięta?
Być może rozmawiałeś lub ruszałeś ręką
podczas pomiaru.
Przyjmij odpowiednią pozycję do
pomiaru.
Poprawnie załóż mankiet.
Zrelaksuj się przed pomiarem.
Podczas pomiaru należy zachować ciszę
i spokój.
Tętno jest zbyt wysokie (lub
zbyt niskie).
Być może rozmawiałeś lub ruszałeś ręką
podczas pomiaru.
Pomiar wykonano bezpośrednio po
wysiłku fi zycznym?
Podczas pomiaru należy zachować ciszę
i spokój.
Powtórz pomiar po 5 minutach.
Samodzielne wyłączanie
zasilania.
Działa system automatycznego
wyłączania zasilania.
To nie jest usterka. Urządzenie wyłącza
się automatycznie po 3 minutach od
ostatniego pomiaru.
DANE TECHNICZNE
Metoda pomiaru
oscylometryczna z technologią Fuzzy Algorithm
Wskaźnik LCD, trzy-liniowy
Zakres wyświetlania ciśnienia w mankiecie, mmHg. od 0 do 300
Zakres pomiaru:
ciśnienia w mankiecie, mmHg.
częstotliwość tętna, 1/min
od 40 do 260
od 40 do 160
Błąd pomiaru:
ciśnienie w mankiecie, mmHg
częstotliwość tętna, %
±3
±5
Napięcie, W 6
Typ zasilania: 4 baterie AA (LR6)
Max zużycie energii, W 0,09
Pamięć 90 ostatnich pomiarów + średnia z trzech ostatnich
pomiarów
Warunki eksploatacji:
temperatura, °C
wilgotność względna, % Rh
od 10 do 40
85 i poniżej
Warunki przechowywania i transportu:
temperatura, °C
wilgotność względna, % Rh
od minus 20 do 50
85 i poniżej
Rozmiar mankietu: powiększony dorosły (obwód ramienia 25-36 cm)
Wymiary:
Rozmiar (elektroniczny moduł), mm
Masa (bez opakowania, torby i elementów zasilania), g
121 x 84 x 64
303
Zawartość zestawu moduł elektroniczny, mankiet Cuff -LDA (w komplecie
z rurkami i trójnikiem), gruszka-pompka w komplecie
LD-S035 (z zaworem ciśnienia i zaworem zwrotnym),
4 baterie, torba, instrukcja obsługi, karta gwaran-
cyjna, opakowanie
Rok produkcji Rok i miesiąc produkcji znajdują się na dolnej części
obudowy urządzenia w numerze seryjnym, po
symbolu “A”
OBJAŚNIENIA ZNAKÓW:
Zgodność z Dyrektywą 93/42/EEC
Uwaga: Przeczytaj instrukcję
Zatwierdzenie typu narzędzi pomiarowych
Producent
Przechowywać z dala od wilgoci
Klasa ochrony II
Produkt typu BF
Dane techniczne mogą ulec zmianie bez powiadomienia w celu poprawy właściwości użytkowych i jakości produktu.
Produkcja jest certyfi kowana według międzynarodowego standardu ISO 13485. Urządzenie LD2 jest zgodne z
Europejską dyrektywą MDD 93/42/EEC, z międzynarodowymi standardami EN980, EN1041, EN1060-1, EN1060-3,
EN10601-1-2, ISO 14971.
WARUNKI GWARANCJI
Na sprzęt LD jest ustalony okres gwarancji, który określono w karcie gwarancyjnej produktu.
Zobowiązania gwarancyjne potwierdzone są kartą gwarancyjną, otrzymywaną przez nabywcę przy zakupie
urządzenia.
Adresy punktów serwisowych realizujących obsługę gwarancyjną, podane są na karcie gwarancyjnej.
Wykonywane jest pod nadzorem i dla Little Doctor International (S) Pte. Ltd. (35 Selegie Road #09-02 Parklane Shop-
ping Mall, Singapore 188307, Singapore. Adres pocztowy: Yishun Central P.O. Box 9293 Singapore 917699).
Producent: Little Doctor Electronic (Nantong) Co. Ltd. (No.8, Tongxing Road Economic & Technical Development Area,
226010 Nantong, Jiangsu, People’s Republic of China).
Dystrybutor w Unii Europejskiej: Little Doctor Europe Sp. z o. o. (ul. Zawiła 57G, 30-390 Kraków Polska, tel.: +48 12
2684746, 12 2684747, fax: +48 12 268 47 53, e-mail: biuro@littledoctor.pl).
Więcej informacji można znaleźć na stronie www.littledoctor.pl
HU
RÉSZEK ÉS ALAKATRÉSZEK MEGNEVEZÉSEI (1. ábra)
8
LCD KIJELZŐ.
1
ELEKTRONIKUS EGYSÉG.
9
M (MEMŐRIA) GOMB.
2
ALJZAT A PUMPA ÉS A MANDZSETTA CSATLAKOZTATÁSÁHOZ.
10
(BEKAPCSOLÁS/KIKAPCSOLÁS) GOMB.
3
LEVEGŐTÖMLŐ.
11
MANDZSETTA.
4
HÁRMAS OSZTÓ A PUMPA ÉS A MANDZSETTA SATLAKOZTATÁSÁRA
AZ ELEKTRONIKUS EGYSÉGHEZ.
12
TÁSKA.
5
PUMPA.
13
ELEMEK.
6
AZ PUMPA VISSZACSAPÓ SZELEPE.
14
JÓTÁLLÁSI KÁRTYA.
7
NYOMÁSCSÖKKENTŐ SZELEP.
15
HASZNÁLATI UTASÍTÁS
ÁLTALÁNOS INFORMÁCIÓ
Ez az útmutató segítséget nyújt a felhasználónak egy digitális LD, LD2 változat (a továbbiakban: KÉSZÜLÉK),
vérnyomás és pulzus frekvenciájának mérésére szolgáló készülék, biztonságos és hatékony működéséhez. A
készüléket az ebben az útmutatóban meghatározott szabályoknak megfelelően kell használni, és nem szabad
felhasználni az itt leírtaktól eltérő célokra. Fontos, hogy olvassa el és értelmezze a teljes útmutatót, és különösen
a „Javaslatok a helyes méréshez“ fejezetet.
MŰKÖDÉSI ELV
A vérnyomás és pulzusszám méréséhez a készülék oszcillometrikus módszert használja a Fuzzy algoritmus
segítségével. A mandzsettát a könyök fölött tekerik a karra és az pumpa segítségével felpumpálják. A készülék
érzékeny része érzékeli a mandzsetta gyenge nyomás változásait, amelyet a brachialis artéria tágulása és
összehúzodása okoz minden egyes szívverés hatására. A készülék méri a nyomáshullam amplitudóját, higanymil-
liméterre konvertálja és digitális érték formájában jeleníti meg azt. A mérési eredmények tárolására a készülék
memóriája 90 cellával rendelkezik. Kérjük, vegye fi gyelembe, hogy a készülék nem biztosítja a megadott mérési
pontosságot, ha azt az útmutató „Műszaki előírások“ fejezetében megadott hőmérséklettől vagy páratartalomtól
eltérően használja vagy tárolja. Figyelmeztetjük, hogy a súlyos aritmiában szenvedő személyek vérnyomásának
mérésékor lelőfordulhatnak hibák. A gyermekek vérnyomásmérésével kapcsolatosan kérje ki orvosa véleményét.
JAVASLATOK A HELYES MÉRÉSHEZ
1. A helyes méréshez tudni kell, hogy a VÉRNYOMÁS RÖVID IDŐN BELÜL IS JELENTŐS INGADOZÁSOKAT MUTATHAT.
A vérnyomásszint számos tényezőtől függ. Nyáron rendszerint alacsonyabb és télen magasabb. A vérnyomás a
légköri nyomás függvényében változik, függ a fi zikai megterheléstől, az érzelmi izgatottságtól, a stressztól és az
étrendtől. Nagyon befolyásolják a szedett gyógyszerek, az alkoholtartalmú italok fogyasztása és a dohányzás.
Számos esetben a klinikai nyomás mérésére szolgáló eljárás is növeli a vényomást. Ezért az otthon mért vérnyo-
más gyakran eltér a klinikán mért vérnyomástól. Mivel a vérnyomás alacsony hőmérsékleten emelkedik, ezért a
mérést szobahőmérsékleten (kb. 20 °C) kell végezni. Ha a készüléket alacsony hőmérsékleten tárolták, használat
előtt, szobahőmérsékleten legalább 1 órát kell tartani, különben a mérési eredmény hibás lesz. A nap folyamán
az egészséges emberek szisztolés (felső) nyomásingadozása lehet 30-50 mmHg és diasztolés (alacsonyabb)
nyomásingadozása legfeljebb 10 mmHg. A vérnyomás függése különböző tényezőkön alapul és minden ember
számára egyedi. Ezért ajánlatos egy speciális naplót tartani a vérnyomásmérésről. A NAPLÓ ALAPJÁN CSAK A
SZAKKÉPZETT ORVOS TUDJA ELEMEZNI A VÉRNYOMÁS VÁLTOZÁSÁNAK TENDENCIÁJÁT.
2. Kardiovaszkuláris betegségekben és számos egyéb betegségekben, ahol az artériás nyomás monitorozására
van szükség, a kezelőorvosa által meghatározott időben végezze a méréseket. NE FELEDJE, HOGY A DIAGNOSZTIKA
ÉS HYPERTENZIÓS BETEGSÉGEK KEZELÉSE CSAK A SZAKKÉPZETT ORVOS ÁLTAL VÉGZETT VÉRNYOMÁSMÉRÉSEK
ALAPJÁN TÖRTÉNIK. A GYÓGYSZEREK ADAGJÁNAK BEVÉTELÉT VAGY MÓDOSíTÁSÁT CSAK A KEZELŐORVOS ÁLTAL
ELŐÍRT MÓDON SZABAD ELVÉGEZNI.
3. Az olyan rendellenességek, mint a mély vaszkuláris szklérózis (érelmeszedés), a gyenge pulzushullám,
valamint a súlyos szívritmuszavarban szenvedő betegeknél, nehéz lehet a vérnyomás pontos mérése. EZEKBEN AZ
ESETEKBEN KÉRJE A SZAKKÉPZETT ORVOS TANÁCSÁT, AKI AZ ELEKTRONIKUS KÉSZÜLÉK ALKALMAZÁSÁHOZ ÉRT.
4. HOGY AZ ELEKTRONIKUS KÉSZÜLÉK A VÉRNYOMÁST HELYESEN LEOLVASHASSA, A MÉRÉS KÖZBEN SZÜKSÉGES
BETARTANI A CSENDET. A vérnyomásmérést szobahőmérsékleten nyugodt, kényelmes környezetben kell
elvégezni. Egy órával a mérés előtt szükséges mellőzni az étel bevitelét, 1,5-2 órával előtte a dohányzást, az
üdítő- és az alkoholos italok fogyasztását.
5. A vérnyomásmérés pontossága attól függ, hogy a készülék mandzsettája megfelel-e a karja méretének. A
MANDZSETTA NEM LEHET KICSI, VAGY NAGY.
6. Az ismételt méréseket 3 perces szünetekkel kell elvégezni, hogy a vérkeringés helyreálljon. Azonban a
súlyos ateroszklerózisban szenvedő személyek a vascularis rugalmasság jelentős csökkenése miatt hosszabb
időintervallumot igényelnek a mérések között (10-15 perc). Ez a cukorbetegek esetében is érvényes. A vérnyomás
pontosabb meghatározásához ajánlott 3 egymást követő méréssorozatot készíteni és a mérési eredmények
átlagértékét használni.
ELEMEK BEHELYEZÉSE (2. ábra)
1. Nyissa ki az elemtartó fedelét, és helyezze be a 4 db. AA elemet az elemtartó rekeszben található ábrának
megfelelően. Ellenőrizze a polaritást. Ne használjon túl nagy erőt az elemrekesz fedelének eltávolításákor.
2. Zárja le az elemrekesz fedelét.
Cserélje ki az összes elemet, ha folyamatosan megjelenik az “ ” elemcsere-jelző, vagy a kijelzőn nincs jel.
Az akkumulátorcsere jelzője nem jelzi a lemerülés mértékét. Javasoljuk az alkáli elemek használatát. A készülék
müködési szabályainak megfelelően az elem körülbelül 1000 mérés végzésre elegendő.
A csomagolásban lévő elemek a készülék müködőképességének ellenőrzésre szolgál, és élettartama alacsonyabb
lehet, mint az ajánlott elemeké.
Az elemek cseréjekor egyszerre cserélje ki mind a 4 db-t. Ne használjon felhasznált elemeket.
Ha a készüléket hosszabb ideig nem használja – vegye ki az elemeket a készülékből.
A használt elemeket ne hagyja a készülékben.
HELYES TESTTARTÁS A MÉRÉS ALATT (3. ábra)
1. Üljön az astalhoz úgy, hogy a vérnyomásmérés során a karja az asztal felületén legyen. Győződjön meg arról,
hogy a mandzsetta körülbelül a szíve magasságában van, és az alkar szabadon fekszik az asztalon, és nem
mozog.
2. Vérnyomást mérhet hanyatt fekve is. Nézzen a plafon felé, nyugodjon meg és ne mozogjon a mérés időtartama
alatt. Győződjön meg arról, hogy a felkaron levő mérési hely kb. a szívével egyvonalban van.
MANDZSETTA ELŐKÉSZÍTÉSE (4. ábra)
1. Húzza a mandzsetta szélét kb. 5 cm-re a fémgyűrűbe, ahogy az ábra is mutatja.
2. Helyezze a mandzsettát a bal karjára, a csövet ilyenkor a tenyér felé kell iranyítani. Ha a mérés a bal karján
nehezen megoldható, akkor használja a jobb karját. Ebben az esetben nem szabad elfelejteni, hogy a mérések
5-10 Hgmm-rel eltérhetnek.
3. A mandzsettát tekerje a karja körül, hogy a mandzsetta alsó széle 2-3 cm-re legyen a könyökétől. Az „ARTERY“
feliratú címke a kar arteriája fölött legyen.
4. Rögzítse a mandzsettát úgy, hogy az szorosan álljon a karján, de ne szorítsa meg túlságosan. Túl szoros vagy
fordítva, a túl laza mandzsetta elhelyezése pontatlan mérésekhez vezethet.
55. A rögzített mendzsettán az „INDEX“ jelzés a „NORMAL (25-36 cm)“ területet jelöli. Ez azt jelenti, hogy a
mandzsetta megfelelően van megválasztva, és megfelel a felkarl kerülete méretének. Ha a jel a «
» jelzésű
területet jelöli, akkor a mandzsetta kicsi, és a mérés eredmény magasabb lesz. Ha a címke a « » jelzésű
területet jelöli, akkor a mandzsetta nagy, és a mérési eredmény kisebb lesz.
6. Ha a kar kifejezetten kúpos alakú, akkor a mandzsettát ajánlatos spirális alakban felhelyezni , ahogy az ábra is mutatja.
7. Ha feltűri a ruha ujját és így szorítja a karját, akadályozva a vér szabad áramlását, a készülék mérés értéke nem
feltétlenül fog megfelelni a vérnyomásának.
MÉRÉS MENETE (5. ábra)
1. Csatlakoztassa a mandzsetta légcsövét és az pumpát a hármas elosztóhoz. Helyezze a hármas osztót a készülék
burkolatán található csatlakozó aljzatba (1. ábra). A mérés előtt vegyen 3-5 mély lélegzetet és lazuljon el. Ne
mozogjon, ne beszéljen, és ne feszítse meg a karját a mérés során.
2. Nyomja meg az
gombot.
3. A kijelzőn rövid időre az összes karakter meg fog jelenni (2. ábra), és két rövid hangjelzés fog következni. A
hangjelzés után a „0“ felirat jelenik meg a képernyőn, és a “
“ jelző villogni kezd. Ez azt jelenti, hogy az eszköz
készen áll a mérésre (3. ábra).
4. Az pumpa indítójának megnyomásával fújja fel a mandzsettát olyan nyomásig, ami 30-40 Hgmm-nál
magasabb, mint a várható szisztolés (magas) nyomás. A mandzsetta nyomása folyamatosan megjelenik a
készülék képernyőjén. Ha a várt szisztolés (magas) nyomás plusz 30-40 Hgmm-es nyomás összege 190 Hgmm-



Alăturați-vă conversației despre acest produs
Aici puteți împărtăși ce părere aveți despre Little Doctor LD-2 Tensiometru. Dacă aveți o întrebare, citiți mai întâi cu atenție manualul. Solicitarea unui manual se poate face folosind formularul nostru de contact.